Roach Care Sheet:Surinam Roaches (Pycnoscelus surinamensis)
Common and Scientific
Name
Surinam Roach (Pycnoscelus
surinamensis)
Breeding Information and
Defining Characteristics
They need it warm and humid to breed. Think Florida.
They grow to about 1 inch in length as an adult.
Colonies are mostly, if not all,
female. Surinam Roaches reproduce through parthenogenesis which means that females reproduce by making exact
copies of themselves.
Housing Requirements
Any secure container is suitable for Surinam
Roaches. Surinam can jump. A petroleum jelly barrier
can be used to prevent them from getting out of the
container. We use Bug Boundary Grease to stop escapes.
Difficulty Rearing
Easy
Climbing Habit
They can climb plastic and glass and they can
jump.
Any substrate is suitable, preferably cypress
mulch because it is easy to clean up, but coconut coir
bedding, or any type of mulch type bedding is fine.
Food Preference
Freshly planted foliage such as flowers, tree
leaves, weeds and potted plants. They like fresh and
dried grasses, straw and Oak leaves. They will not do
well without this type of food and you may experience
die-off without a source of plant material as food.
Pick some leaves and bag them for an off season food source
or you can buy Surinam food from us. You can also get
bagged leaves on from these links.
Temperature and Humidity
They need heat to breed. Their respiration
gives enough humidity, there is no need to add water but you
should have a small bowl of Cricket Crystals in their
enclosure to ensure moisture.
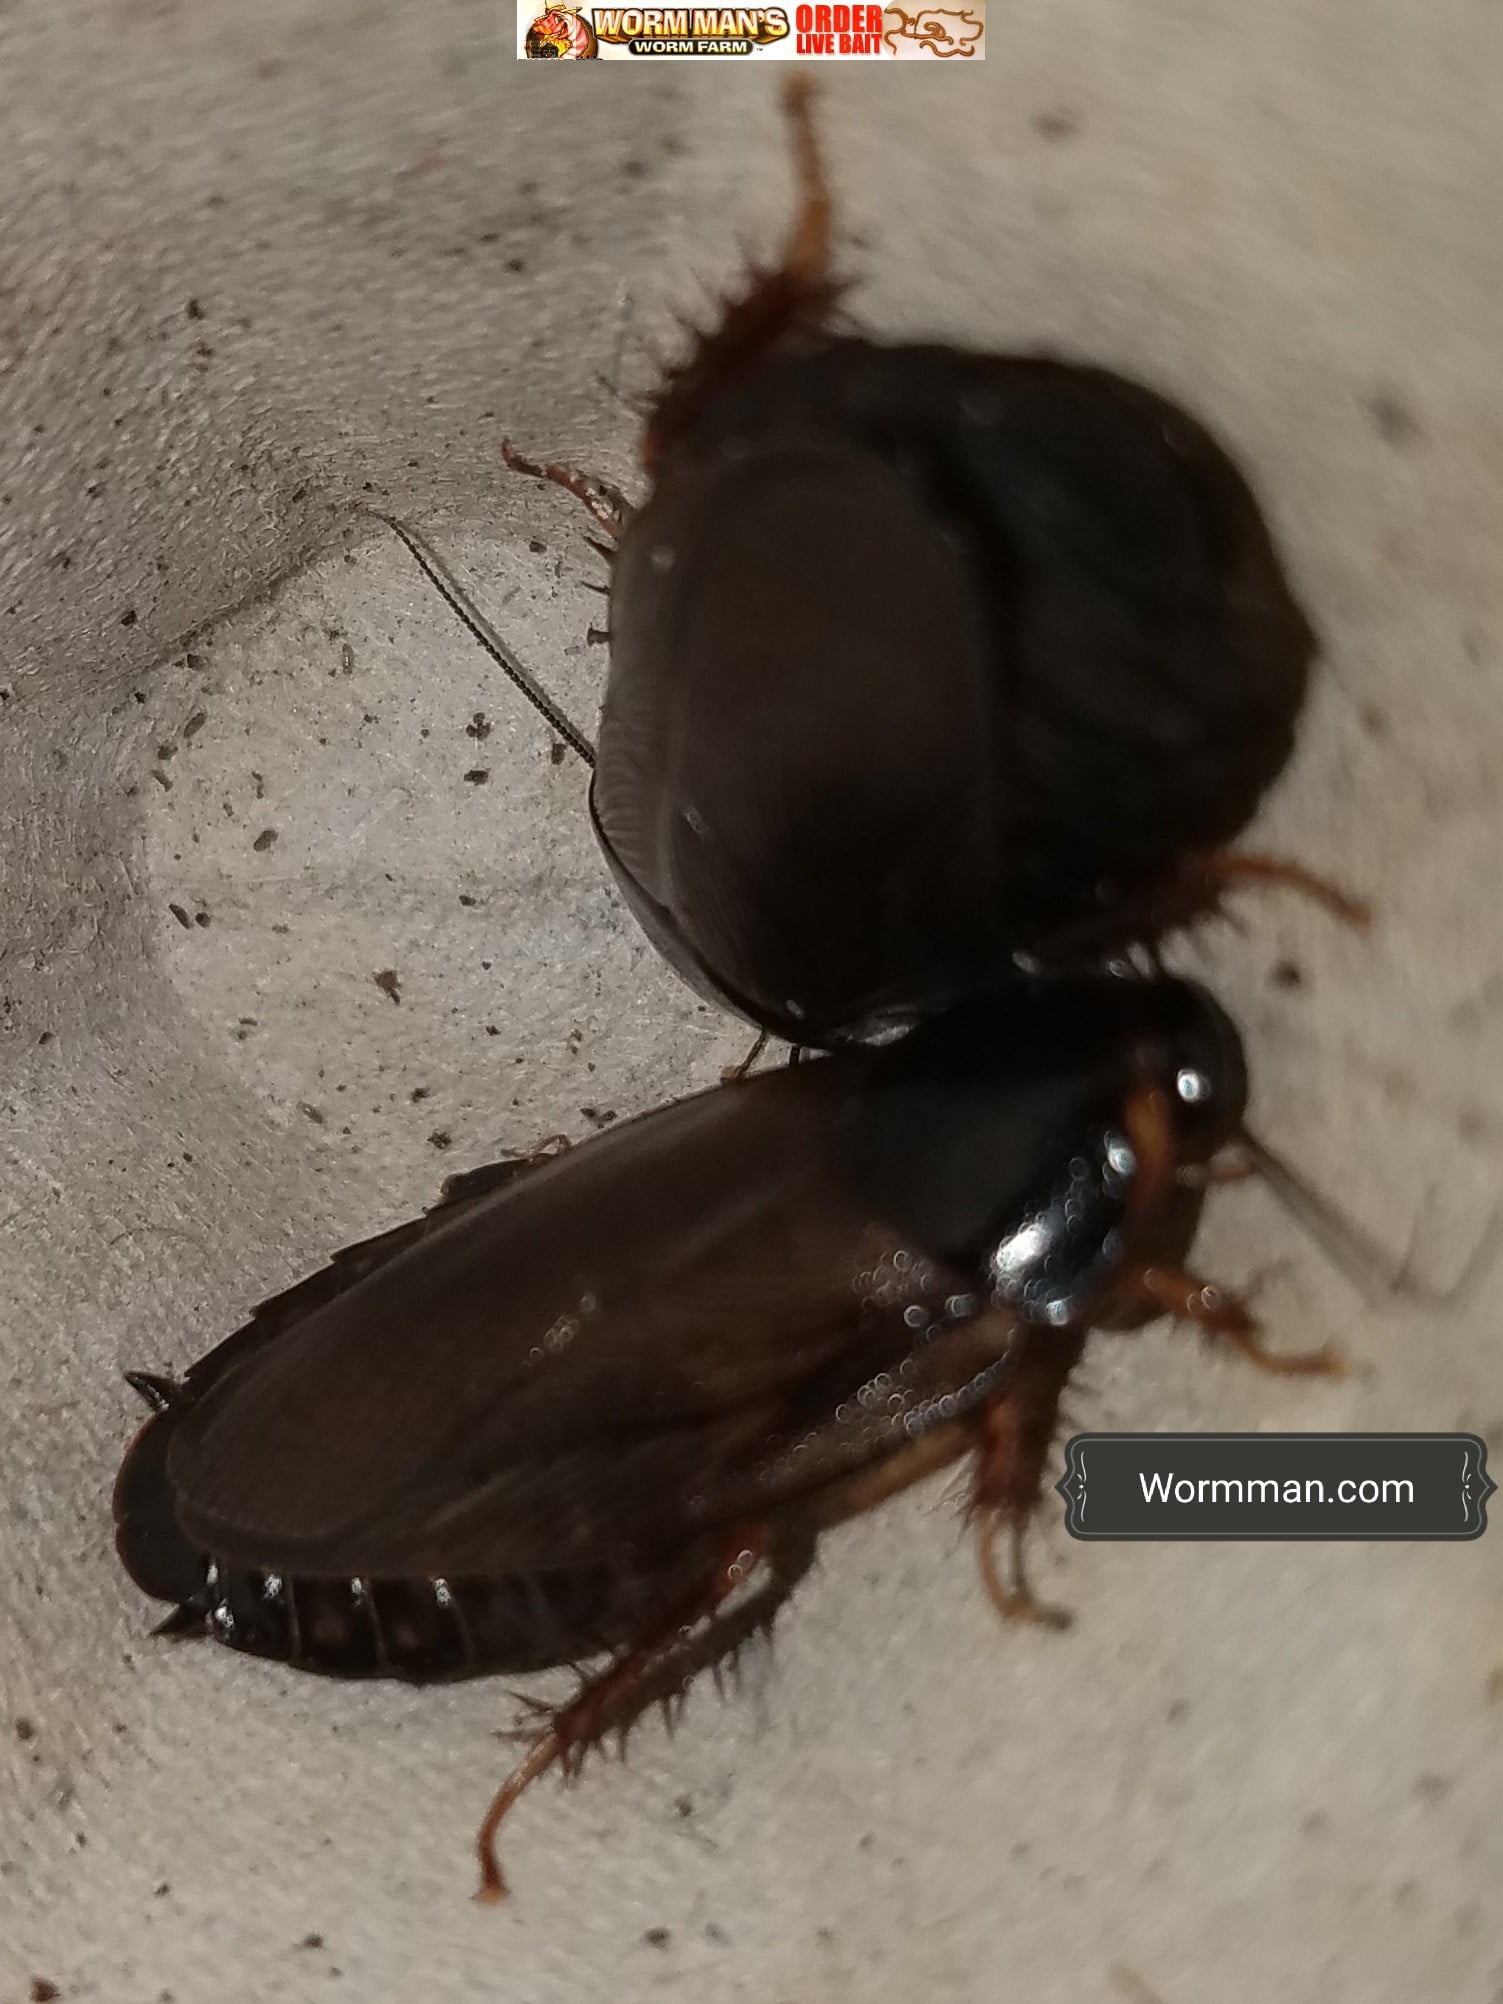
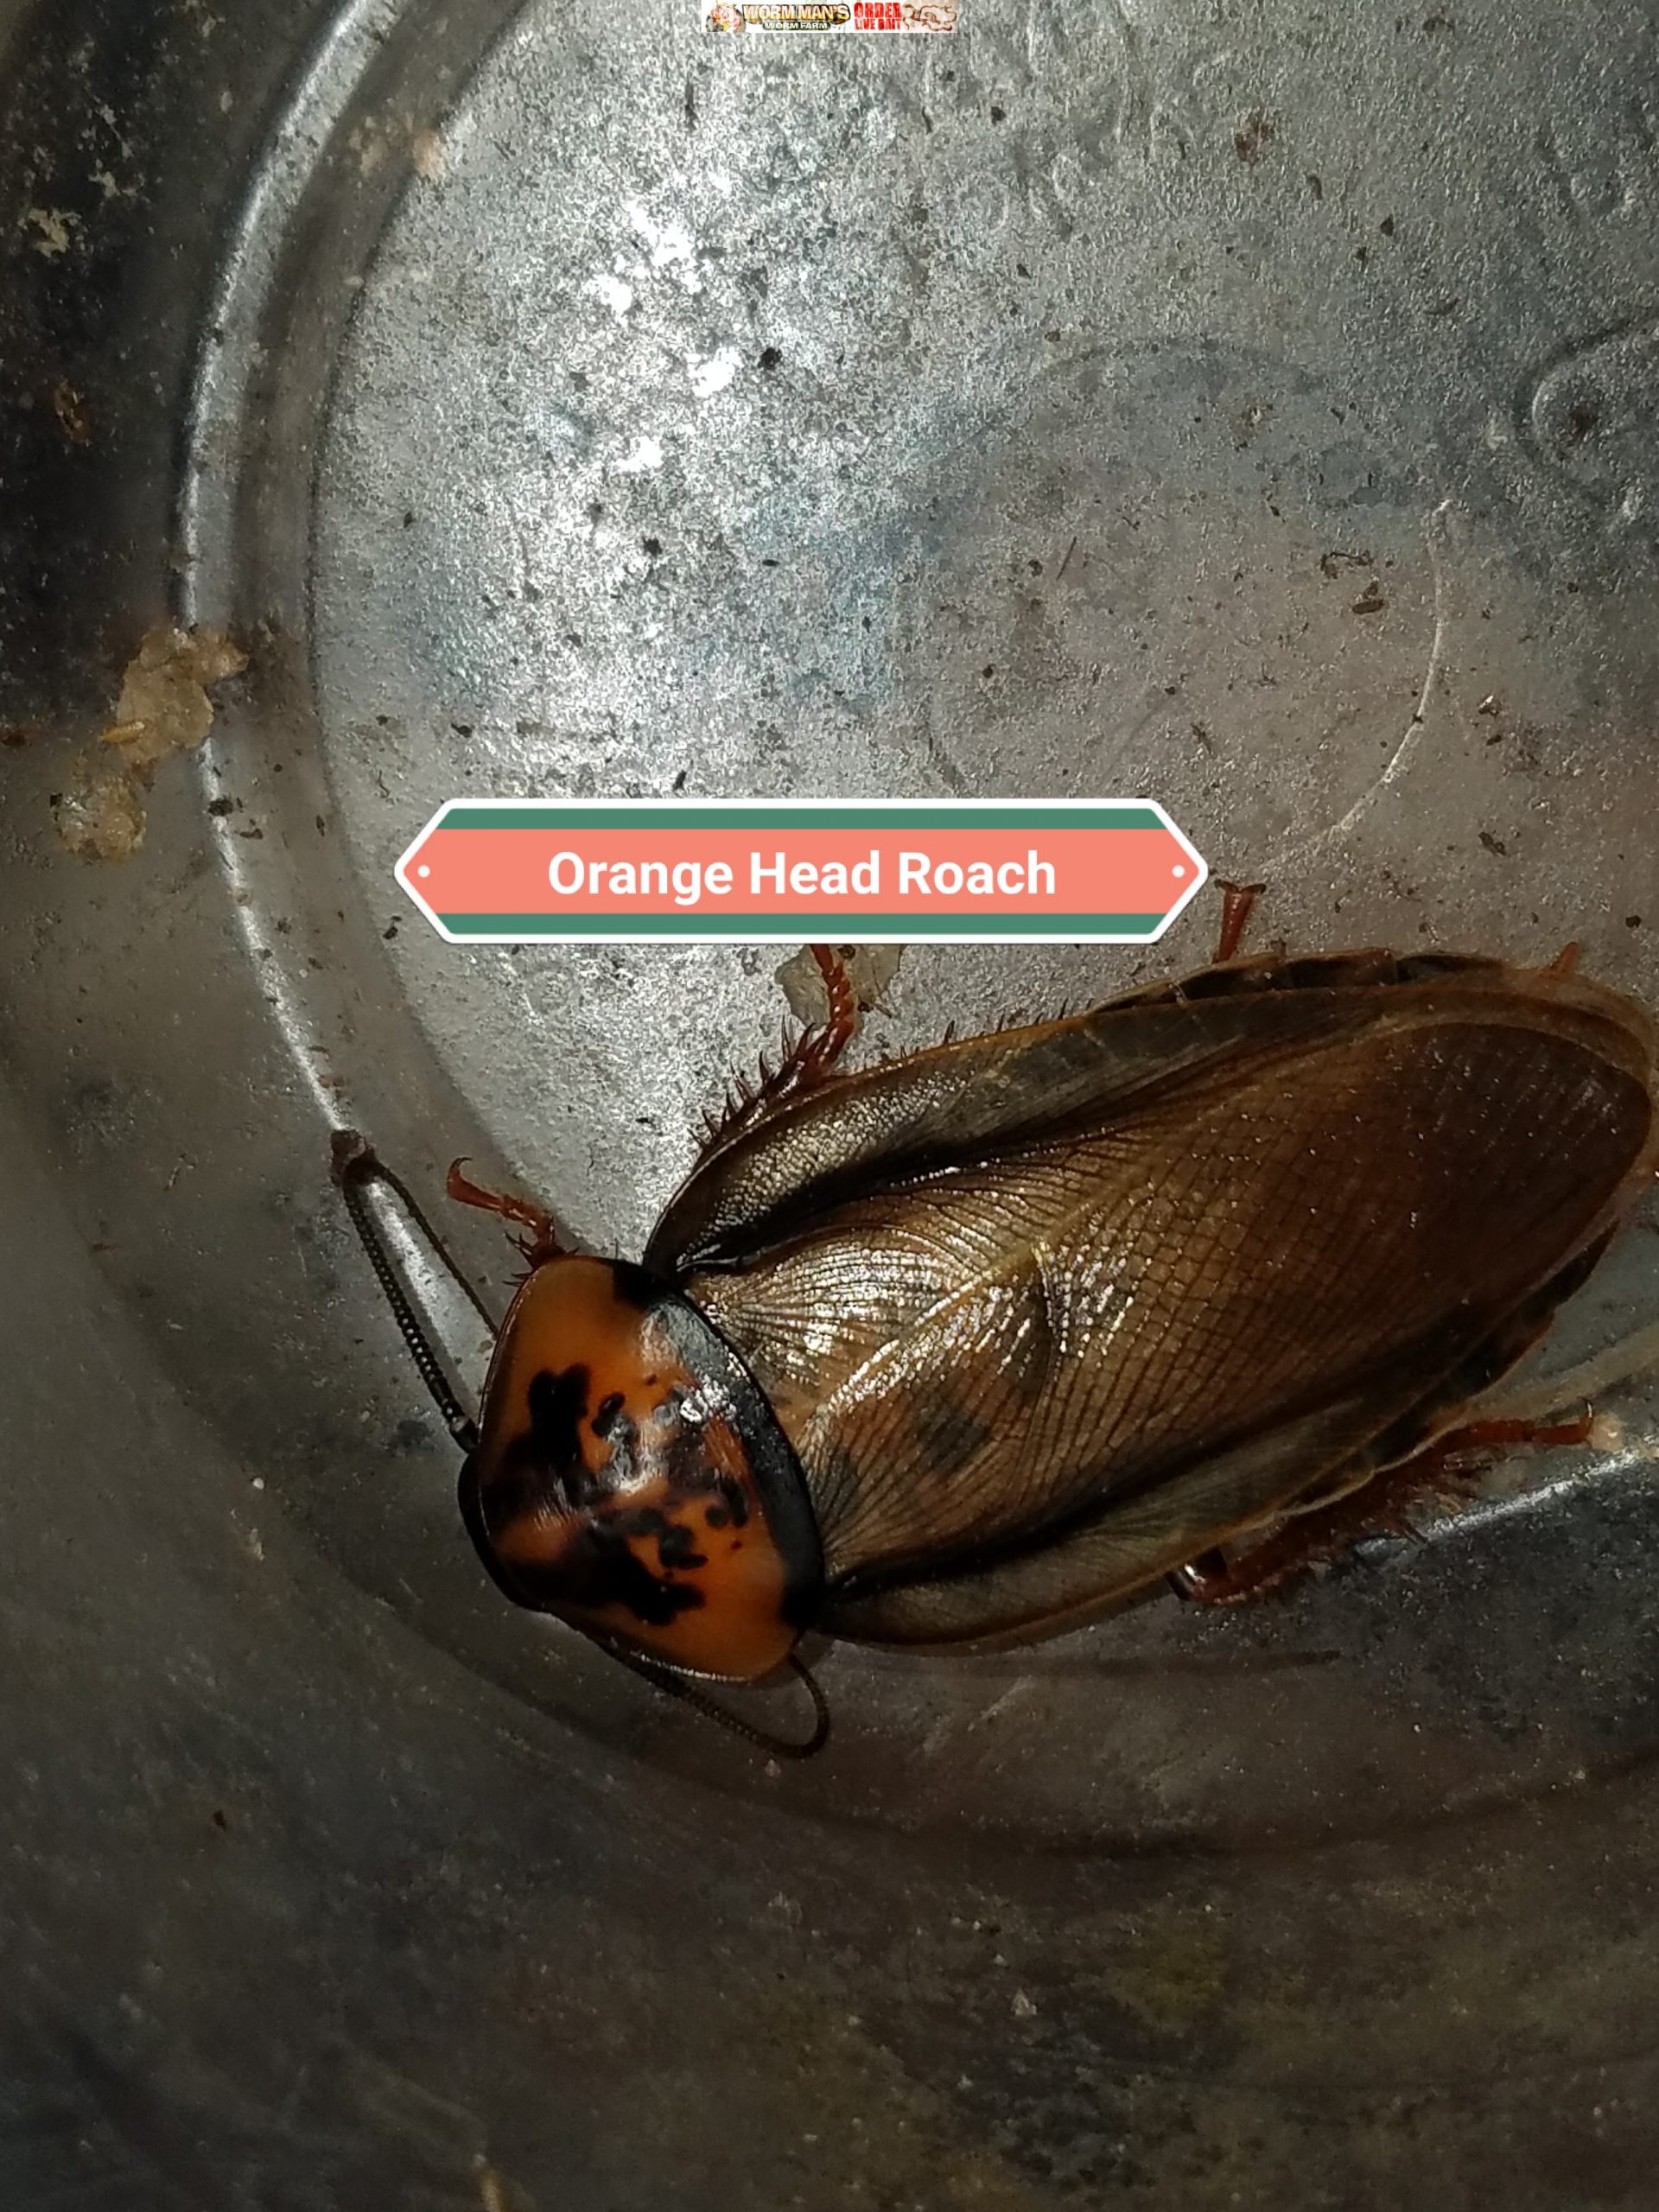
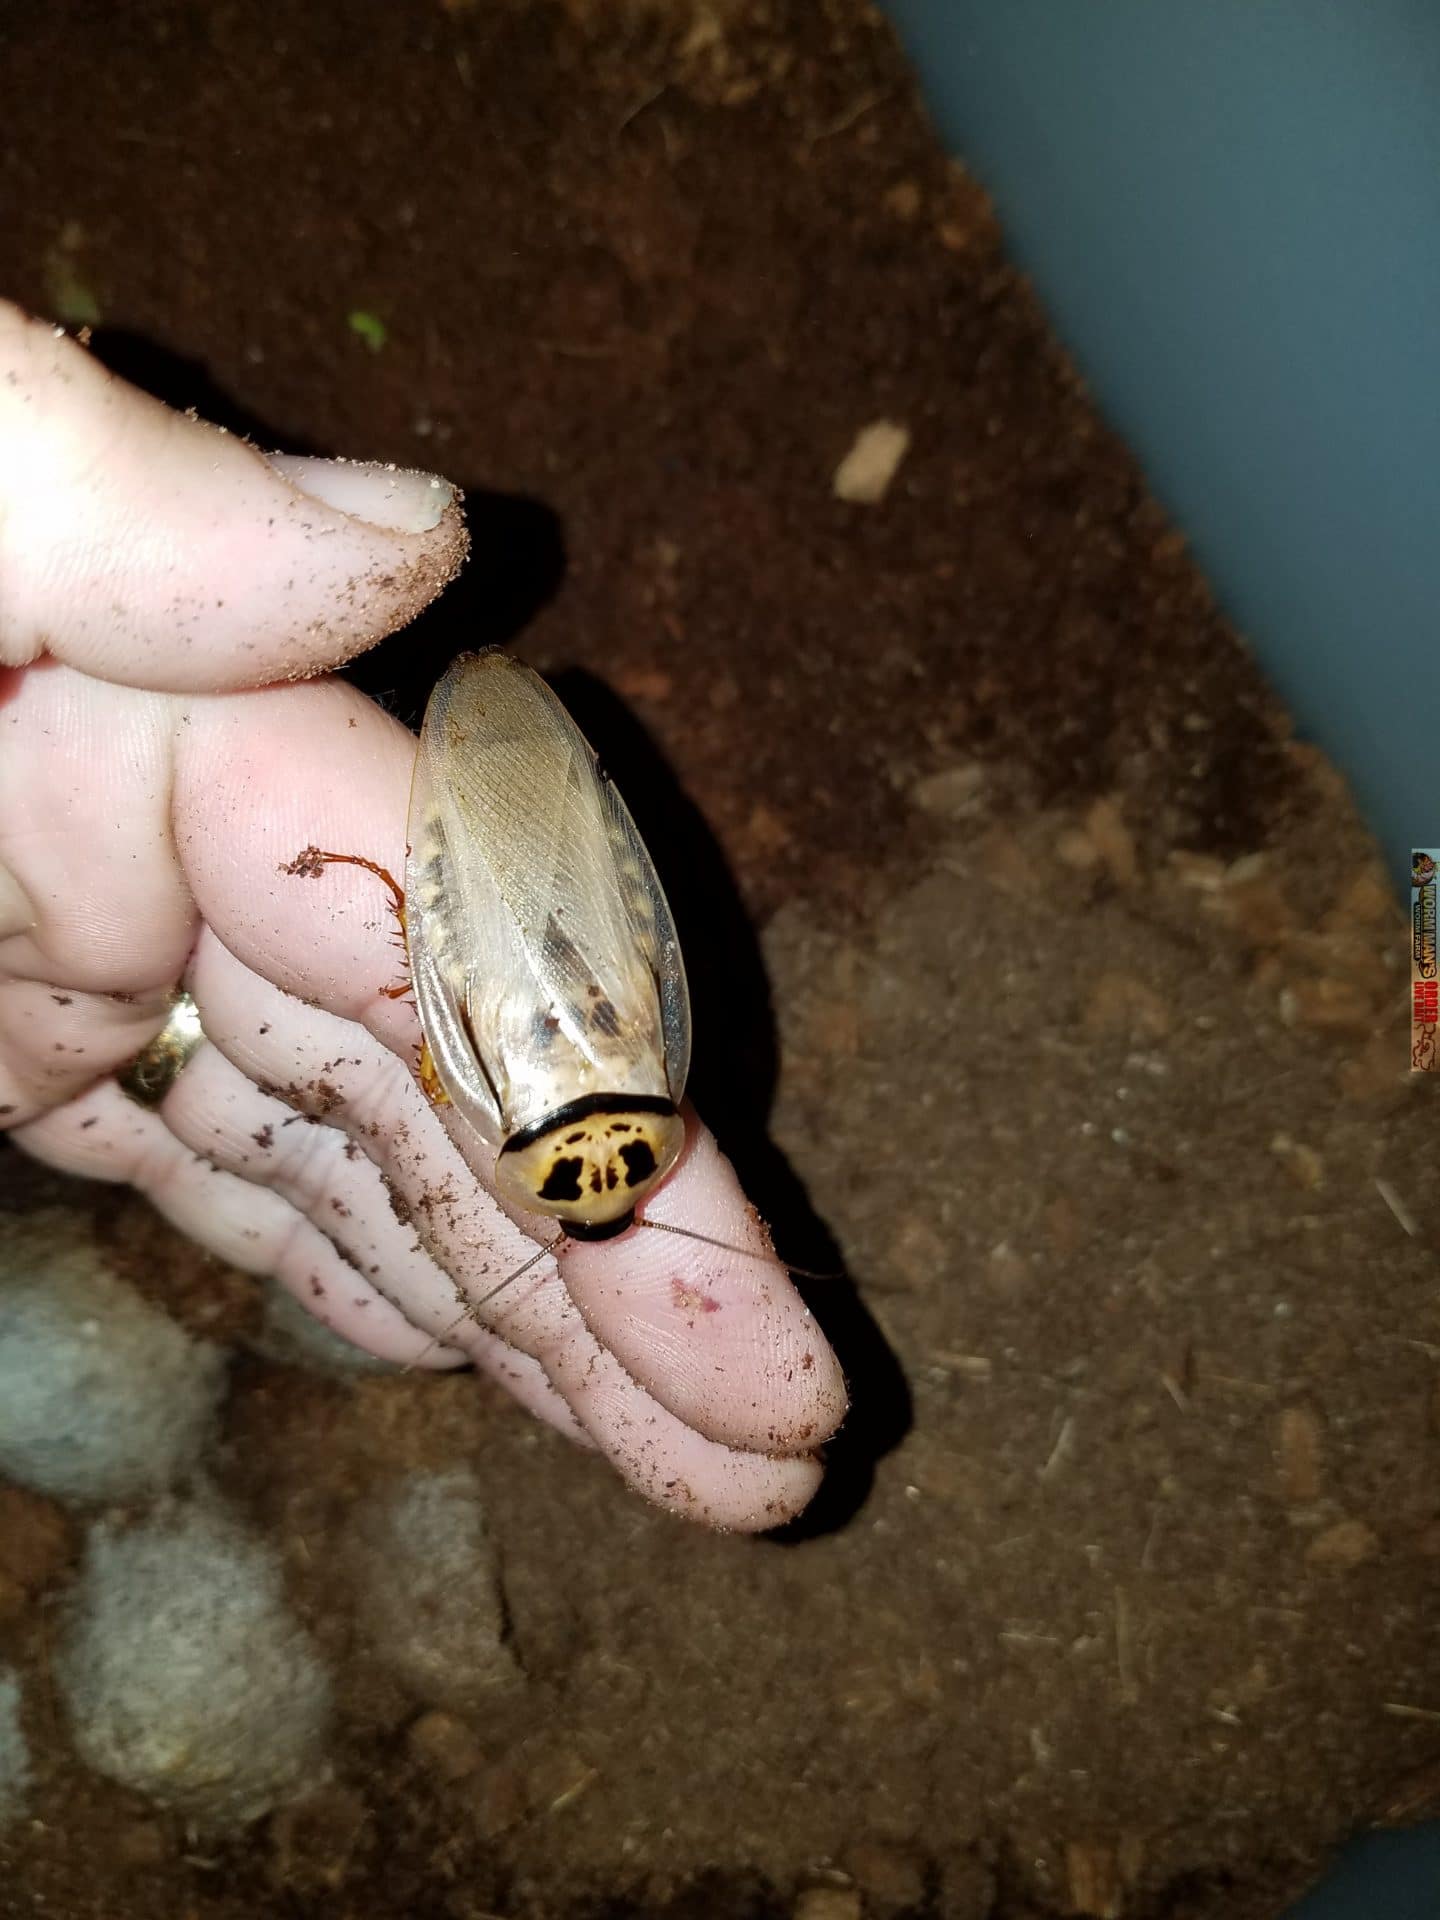
If all requirements are met, then Orange Head Roaches will breed readily once they develop wings.The time with which they will reach maturity will depend upon warmth and food supply.
They emit an odor when disturbed that sort of smells like garlic bread. Adults develop and orange head which their name reflects.
Housing Requirements
Any container is suitable for use, size
depends on how many roaches you intend to keep.
Difficulty Rearing
Easy.
Watch for wing biting. Orange Head Roaches are known
for wing biting and they will eat their cleaning crews so
watch out. Keep constant protein supply and water
crystals with them at all times.
Orange Head Roaches love a substrate of
coconut coir or peat moss and leaves. They love to
burrow and hide. The problem is that the moist substrate will make the smell worse. They already have
a smell when disturbed. Keep them without a substrate
and provide hiding spaces using egg cartons and empty paper
towel and toilet paper roll inserts.
Temperature and Humidity
They can eat any type of food. Examples
include fruits, vegetables, grains and they will even eat
each other and other insects that they can get at.
Restrictions
Not Legal in Florida or Hawaii.
Pictures:
Picture on the left is and adult Orange Head Roach
The picture on the right is of a nymph.
3. You will need 2 shoe boxes. You will not need the lid unless you live in a very dry climate.
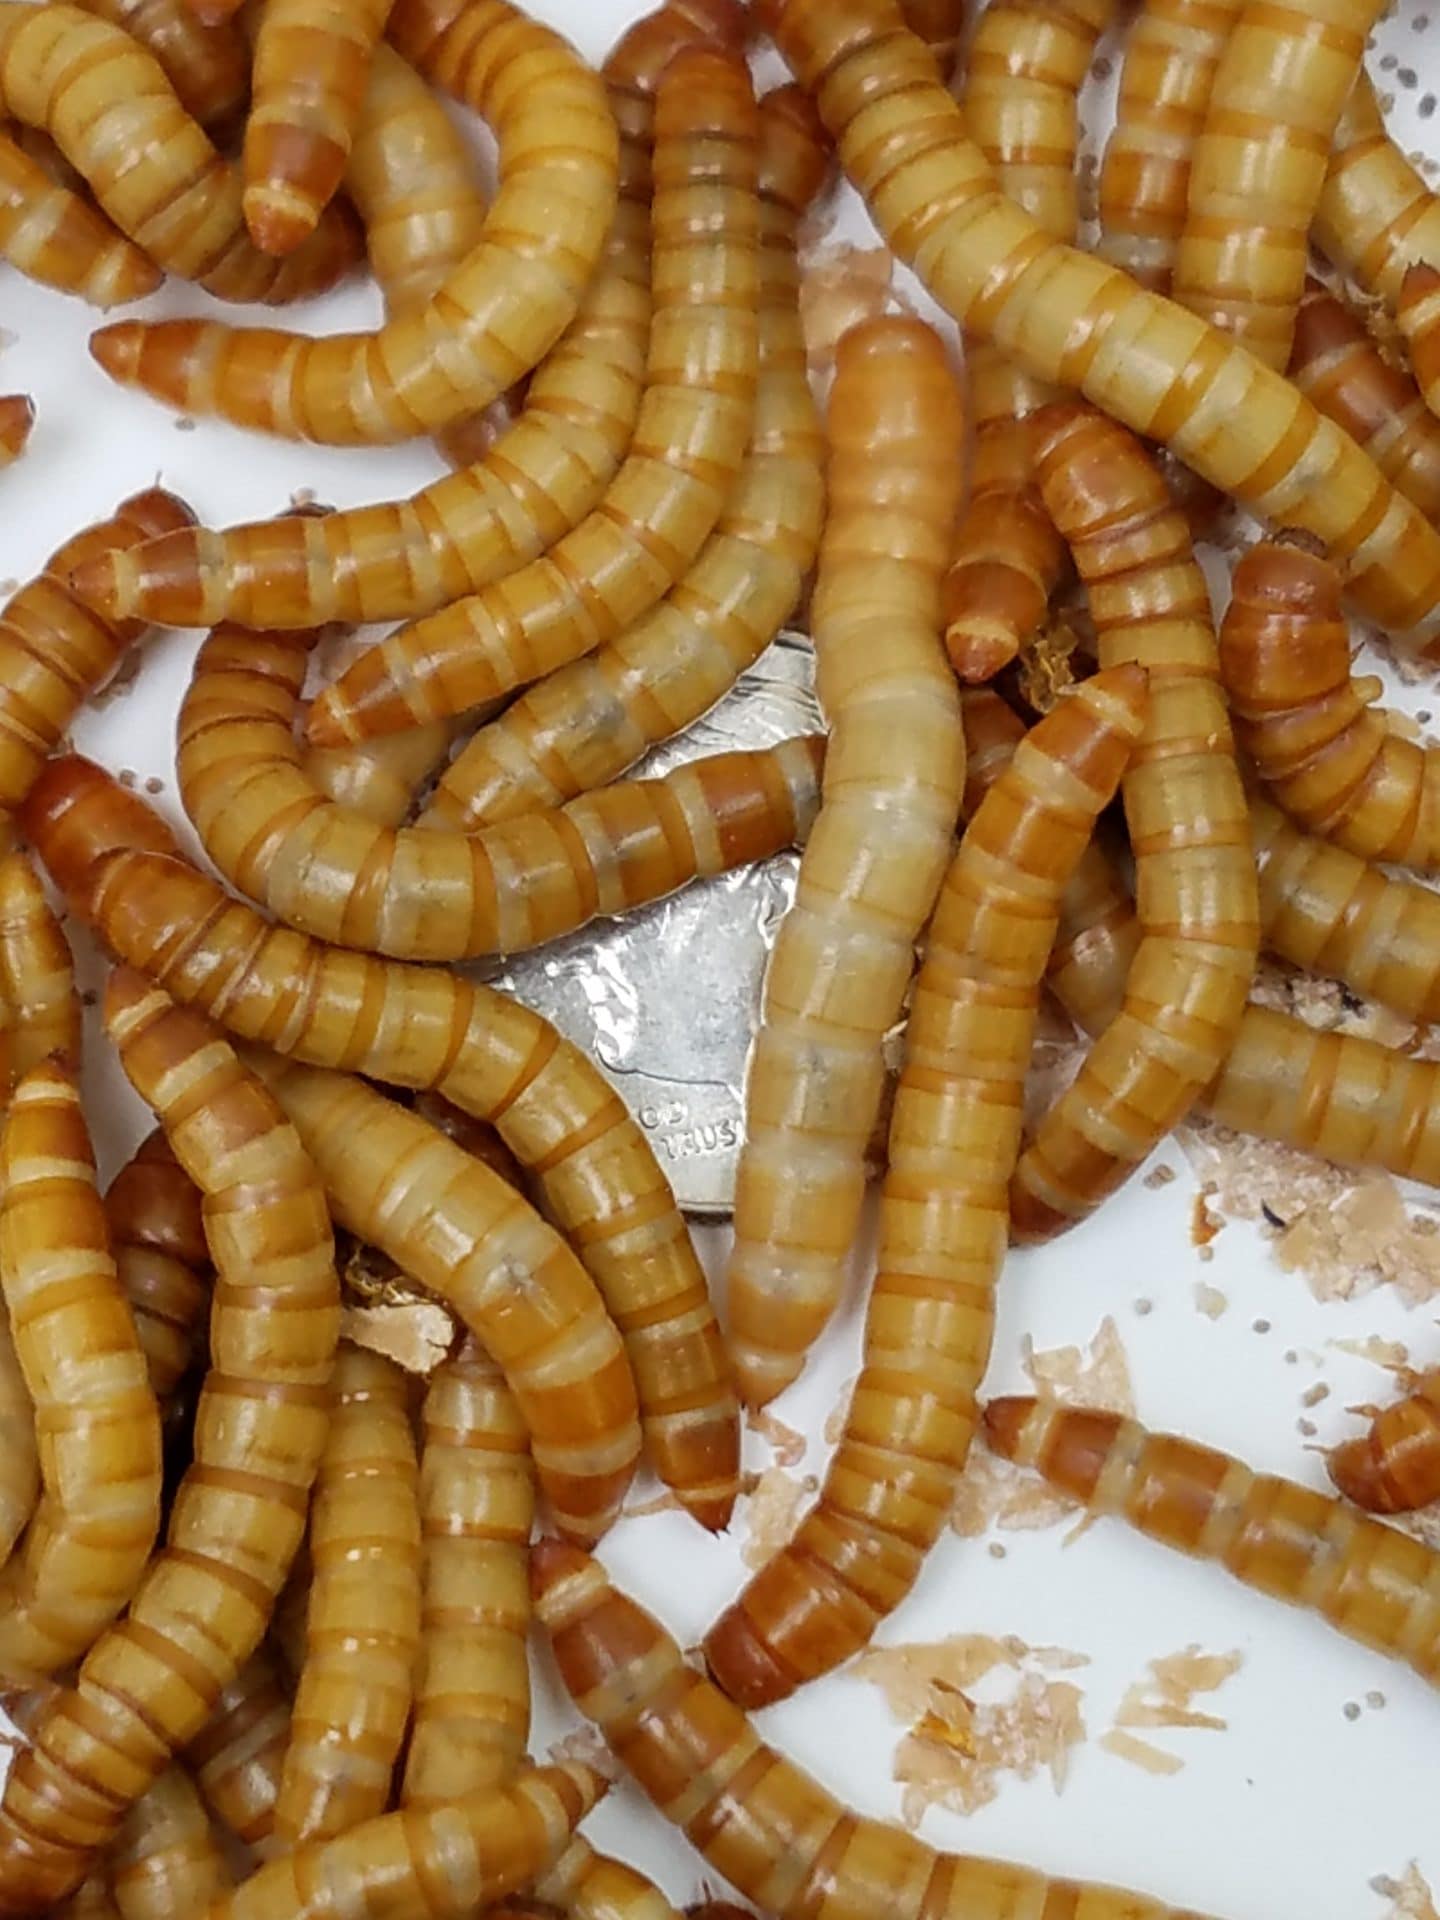
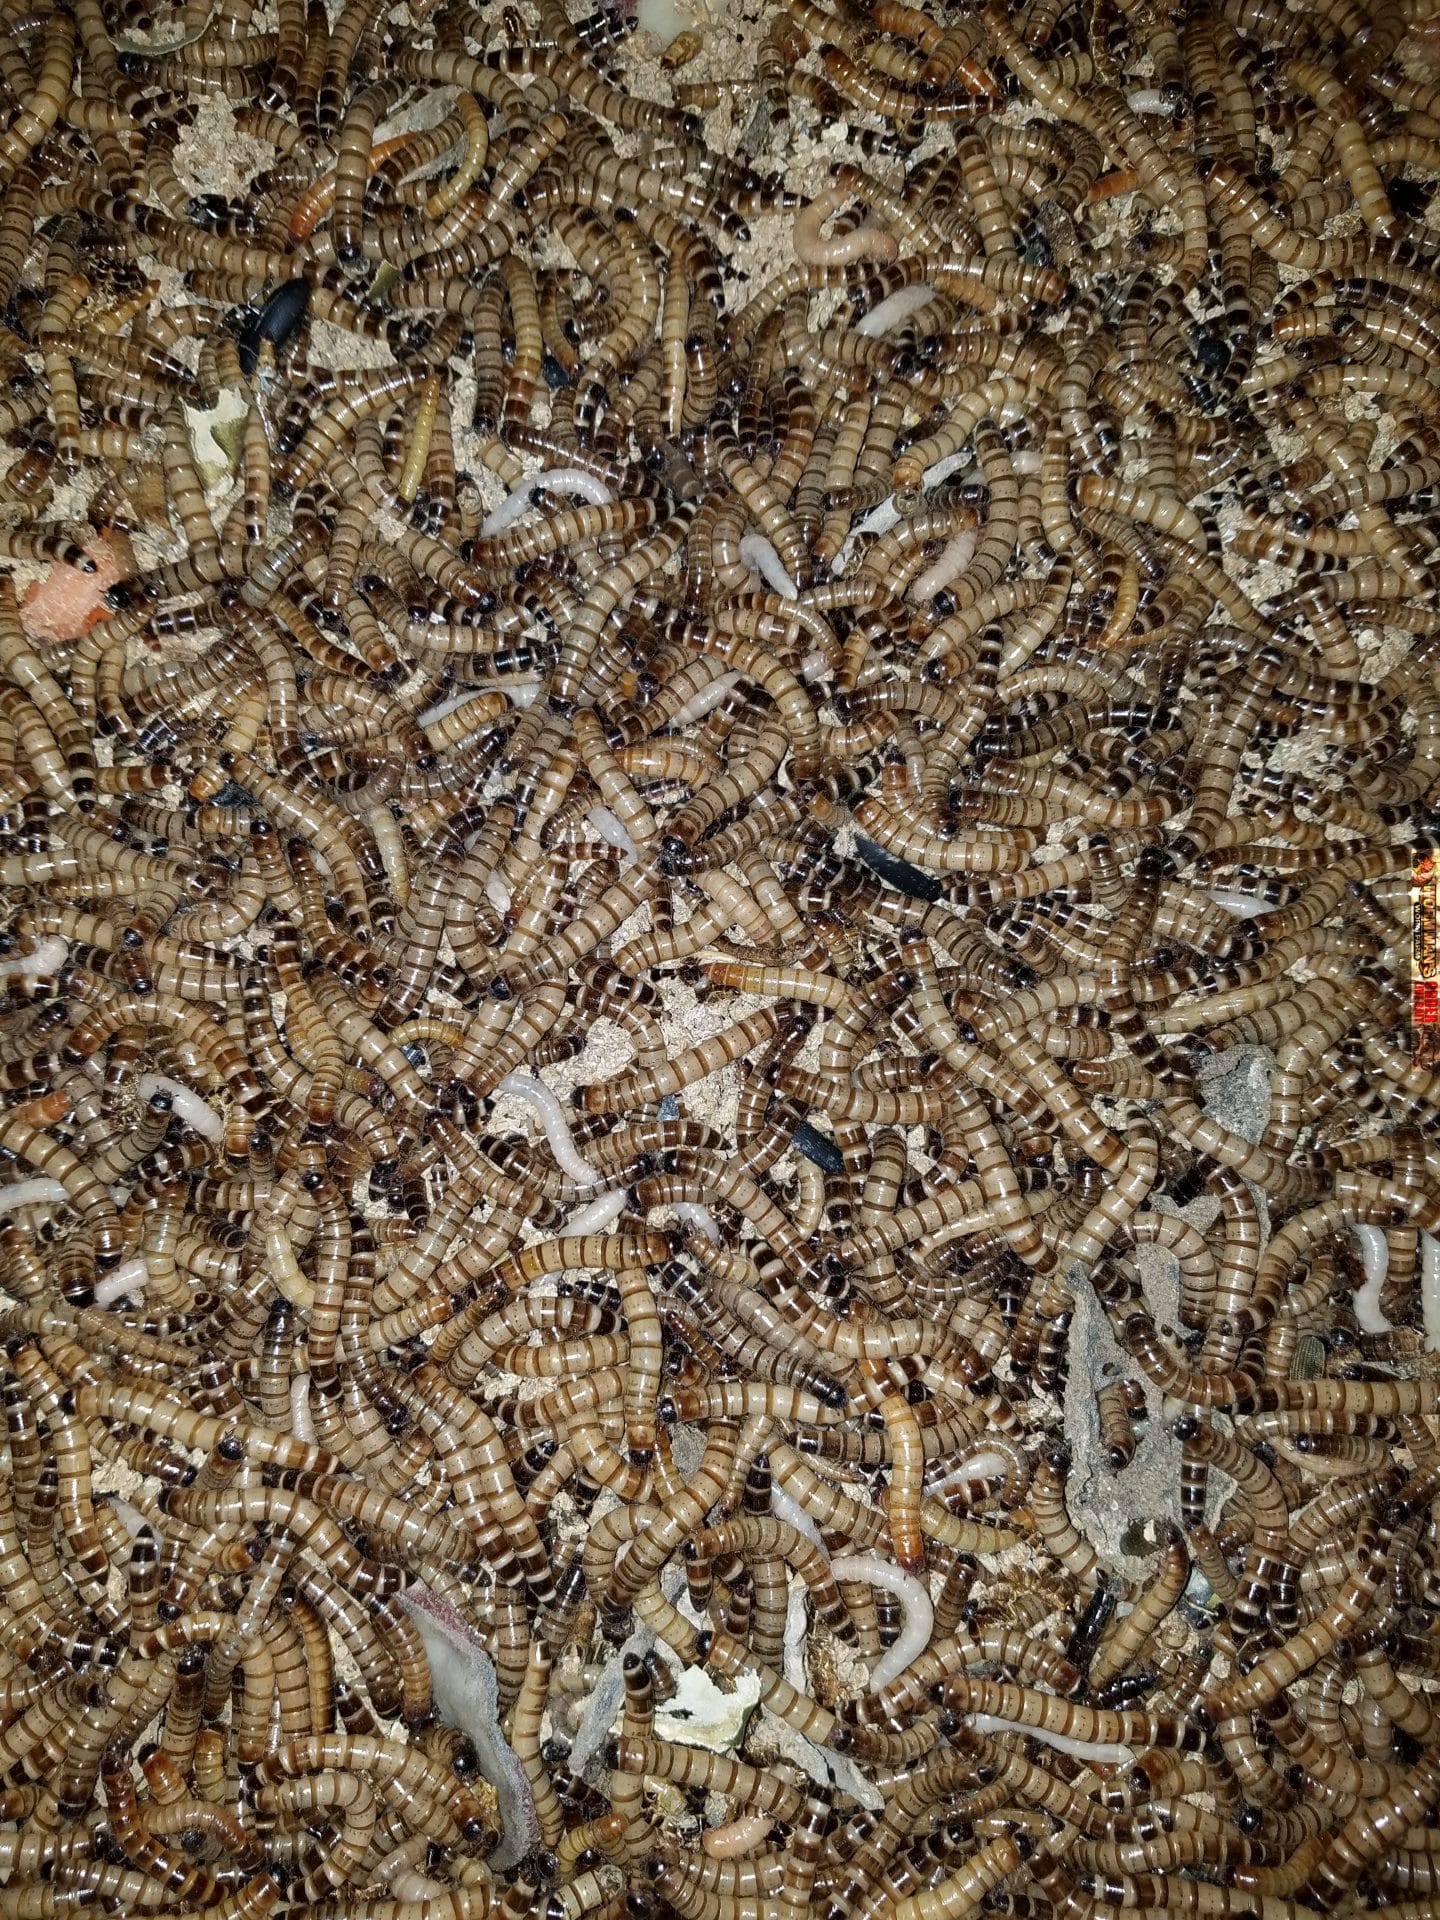
Mealworm Life Cycle:
Mealworms
Mealworm Pupa
Mealworm Beetles
Mealworm Breeding Instructions:
1. Retrieve your worms from the package and place them in one of the containers with about 1/4” of the bedding/food. You will not need the other container right now so store it in a safe place.
2. Feed the worms a slice of potato or cucumber. Please replace daily and throw away the old piece.
3. Let your worms eat the bedding and drink from the vegetable until the morph into beetles which should happen over the next couple of weeks.
4. Keep them worms in a warm place. Room temp or above, to about 85 degrees, will work well. Ensure that the bedding does not get wet or mold. You can do this by fluffing it weekly.
5. Your worms will morph into pupa and then they will becomebeetles. Remove the beetles from the container and place them in the second breeding container with ¼ “ of the wheat bran and give them a slice of potato.
7. Over the next couple of weeks the beetles will lay eggs in the bedding. After about a week, baby worms will be visible in the bedding, especially under the potato slices.
8. Just leave the beetles in that container and allow them to lay eggs until the die, which will take a couple of weeks
9. The worms will take a few weeks to grow out into large worms and then you will be able to repeat the process.
10. To size the worms, just move the beetles into a new container every week. You can use a shoe box or a Rubbermaid container. You do not have to do this but this will help you have the same size worms in each container. This is how the big superworm farms do it.
You can supplement their wheat bran bedding with non-medicated chicken feed, table bran, and things like whole grain cerial and oats.
If you are looking for clean, disease free, Tubifex worms to
feed to your fish, or if you are just looking for Tubifex to
feed to your septic system to clean our your leach fields, then
you have come to the right place. This is a homemade
Tubifex Breeding and Culturing Machine. The name needs
some work and it is ugly, but it works and it works well. I scaled down our Tubifex setup using items that you can get at a pet shop or on Amazon and ebay. I will link to those items in this guide and some of the links are affiliate
links. We need to eat too. :-).
This is a close up of our Tubifex Breeding Setup.
Anyway, this Tubifex breeding system will allow you to culture
your own Tubifex with very little effort and it is a fun if this
is what you are into, and I am into it.The process is simple. You have a tank on the bottom
filled with enough aged water to cover the filter and the
powerhead pump. The bin on top has a slow flow of water
entering it. That is the growing and breeding
container. The water gets filtered and aerated on in the
bottom tank and then gets slowly circulated in the upper
breeding tank.You will get some Tubifex in your bottom tank and that is
fine. Feed them there too. The top tank will be
where the majority of the breeding, feeding and growing takes
Here is the video of our two tier system.
place.
What you will need:
1. A 10 gallon fish tank. 2. A second bin. A Rubbermaid or
Sterlite container is fine. This is the one I bought for
this.
3. A submersible filter. I bought the small filter and an air pump with a stone. You will need both of these. Remember to get the filter fiber and the carbon for the filter.
4. Bag of cotton fiber filler for the filter. (Say that 10
times fast).
5. A small pond pump with enough tubing to go from the 10 gallon tank to the upper tank. The water flow must be adjustable.
6.
Tubifex Worms. Of course, we can’t forget these. We sell Tubifex worms in 100 count bags. We will soon sell them in larger quantities and we will have information regarding using Tubifex for leach fields for septic sytems so please look out for that in the future.Tools:
A drill to make holes in the upper tank so that the water
overflows out of the holes and into the bottom tank.
Food:
Brown Paper bags, cardboard and/or brown, unbleached paper
towels.
Goldfish food.
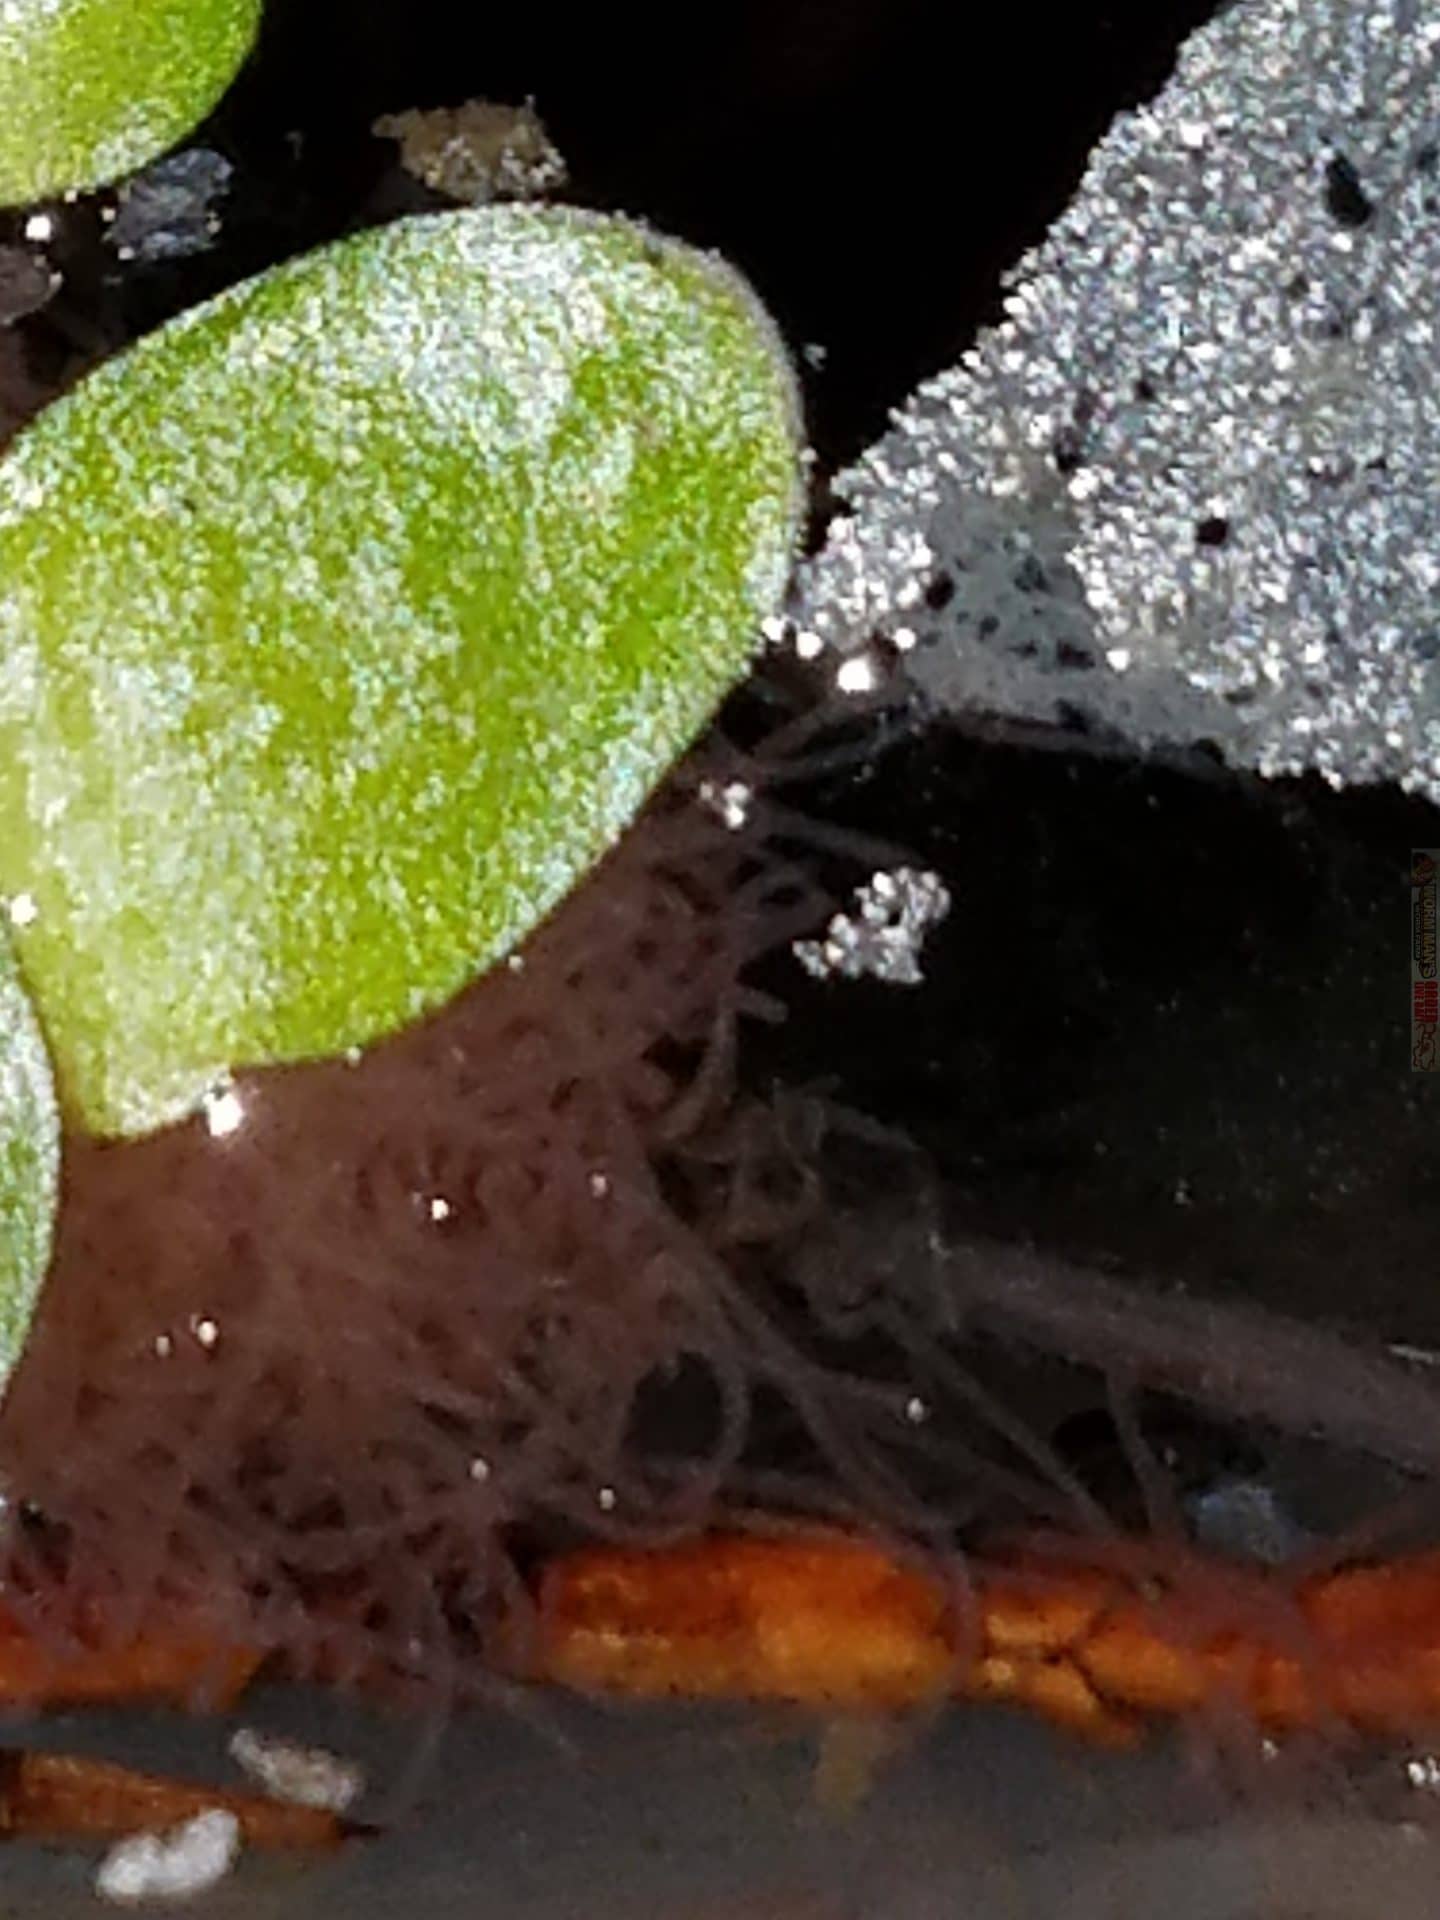
These are all pictures taken of Tubifex worms that were created
in this setup. I only put 100 small worms in this setup 30
days ago and you can see that there are many more than that in
the clumps alone, not to mention the ones that are swimming
around or that are attached to the paper in the Tubifex breeding
setup.
Instructions:
The key to breeding Tubifex worms is to ensure a well aerated,
cool and flowing water supply. If you can supply those
three things, Tubifex will grow and breed well, they will be
clean and they will easy to maintain.
I scaled down our system, which uses 80 gallon Rubbermaid tanks
and 3 tiers of smaller bins. Check out the video on the 3 Tier Tubifex System.
The point of the system is that the large tank is for aerating
and filtering the water. Then the pond pump delivers that
water to the top tank which has stones on the bottom for the
worms to anchor to, and a continuously resupplied layer of
unbleached paper towels, cardboard or paper bags. The
worms will eat the paper source. We also supplement the
paper food with fish food flakes. Feed fish food flakes
sparingly. For instance, we sell Tubifex cultures with 100
worms. You can barely see them because 100 worms get lost
in the volume of water they are shipped in. DO NOT feed
them fish food flakes when they arrive.
Installation of Worms from us. I am adding
this so that you can care for the Tubifex that you order
from us. PLEASE DO NOT ORDER TUBIFEX WORMS UNTIL YOU HAVE YOUR SYSTEM SET UP. 🙂 Sorry for yelling but you can kill your worms if you buy Tubifex from us and then get your setup later. Tubifex Worms for Sale Here. 1. Age some tap water for a day or so, or get
distilled water. Chill it in the refrigerator.
When your worms arrive put a couple of inches of that aged,
chilled water in a container and then pour your worm culture
in.
2. Add an airstone. This is very important.
3. Add as small section (maybe 2″x2″ if a paper bag
to the water and let your worms settle in. 4. Remove about 10% of the water every day and
replace with fresh aged water from your refrigerator.
Use a clear glass to remove water and hold it up to the
light to ensure that you are not removing Tubifex
worms. If you do not disturb the paper during the
removal of the water, you will not have many worms in the
water you remove.
5. Add more bag sections as needed. You will
know when they are needed as they fall apart.
6. After about a week you can add one flake of fish
food every other day or so. Do not add more than this,
even if it is tempting.
7. Continue the process until you can visibly see the
worms swarming the flake food when you add it.
If you add a sponge filter, like the one here, you do not have to change the water out every or two.
We do a 10% to 20% water change every week in our tanks. We only change the water from settled tanks (tanks that have not been stirred sothat the sediment and worms are not disturbed.)
This video shows how we do that:
The worms will feed and reproduce. They will anchor themselves to the aquarium rocks and they will eat from the brown paper that you provide.
Do not feed from your set up until you have large clumps of worms forming or you will deplete your breeders and your Tubifex culture will never get established. Order Tubifex Worms Here.
This Tubifex Breeding System createst he waterflow needed to keep the worms healthy and it also keeps the bins aerated while not distrubing the breeding worms in the top bin.
Some worms will go through the overflow holes but that is not anything to worry about.
You will have to regulate the pump to keep a steady flow without overflowing the top bins.
The first system is a two tank system while the system below is a 3 tank system used to catch Tubifex that might get out of the top tank.
WARNING: if you turn the system off to maintain it then you will have to pull the hose out of the top tank or the water will drain out into the bottom tank. You can also install an inline check valve in the water supply line from the pump to stop the water from doing that in case of a power failure.
Not taking precautions can cause you to lose your worms during a powerfailure if the top tank drains and is left for an extended period of time.
pH is the measurement of the acidity of the bedding. Red Worms, European Night Crawlers and African Nightcrawlers, all composting worms for that matter, need a neutral worm bedding pH in order to thrive. Worm bins that have bedding that is too acidic or alkaline post health risks for the worms. Before the worms die, however, they will attempt to migrate out of the worm composting bin.
Why is pH important to red worms and all composting worms?
pH is important because the worms cannot live and breed in a bedding that is too acidic or alkaline.
How does the pH turn acidic?
pH can be impacted by lack of air flow through the worm bin and bedding, too much moisture in the worm bedding and by the food that is fed to the worms. Acidic food can, over time, cause worm bedding to form acid. That doesn’t mean that you can’t feed your worms citrus, but it does mean that you have to monitor pH and ensure that any fluctuations in compost bedding bin pH are caught and corrected.
Please help me understand pH. Does a high pH number mean high acid?
No. pH is on a scale from Acid to Alkaline, so a low number means a higher acid level and a higher number means that the worm bedding is more alkaline.
What is the right pH for Red worms?
The proper pH for red worm composting is between 6 and 7. This is not an exact science and some worms, like the African Nightcrawler, will have a higher acid level in there worm bin. The African Night Crawlers also have a tendency to pull bits of food under the bedding as they eat it. If you are feeding prepared grain based worm food, like chicken egg layer feed, this can cause higher acide levels if the food goes uneaten and breaks down in the bedding. Feed grain based foods sparingly, and only feed again once you are sure that all of the food is gone.
How do you adjust the pH of worm bedding in a worm composting bin?
Adding eggshells to your weekly feedings of your composting bin or beds will help reduce acid. You can also adjust the pH by properly aerating the bedding and ensuring that there are adequate air holes in the worm bin.
You also should ensure that the worm bedding isn’t too wet. Moist worm bedding is great, but wet worm bedding is not. Wet compost bin bedding will cause anerobic bacteria to take over and this will cause major issues. Your worms will die without swift action to dry out the bedding and without treatment of the acid levels.
If the aforementioned preventative methods or cures are put into place and you still have pH issues in your worm bin, then having some powdered limestone on hand is the best way to go.
Lightly sprinkle powdered limestone on the surface of the bedding and then mix it into the worm bedding. Test the bedding a couple of days after applying lime to ensure that the bedding pH is being corrected.
Where can I get powdered lime for my worm bed?
You can get powdered limestone from any farm and garden store or you can get it from us. We have bagged limestone and we have it in a shaker top can.
One caveat on lime is that you have to ensure that you get powdered lime and not hydrated lime. Hydrated lime will kill your worms. Powdered limestone is what you need. This is what a bag of powdered limestone looks like from a farm and garden store.
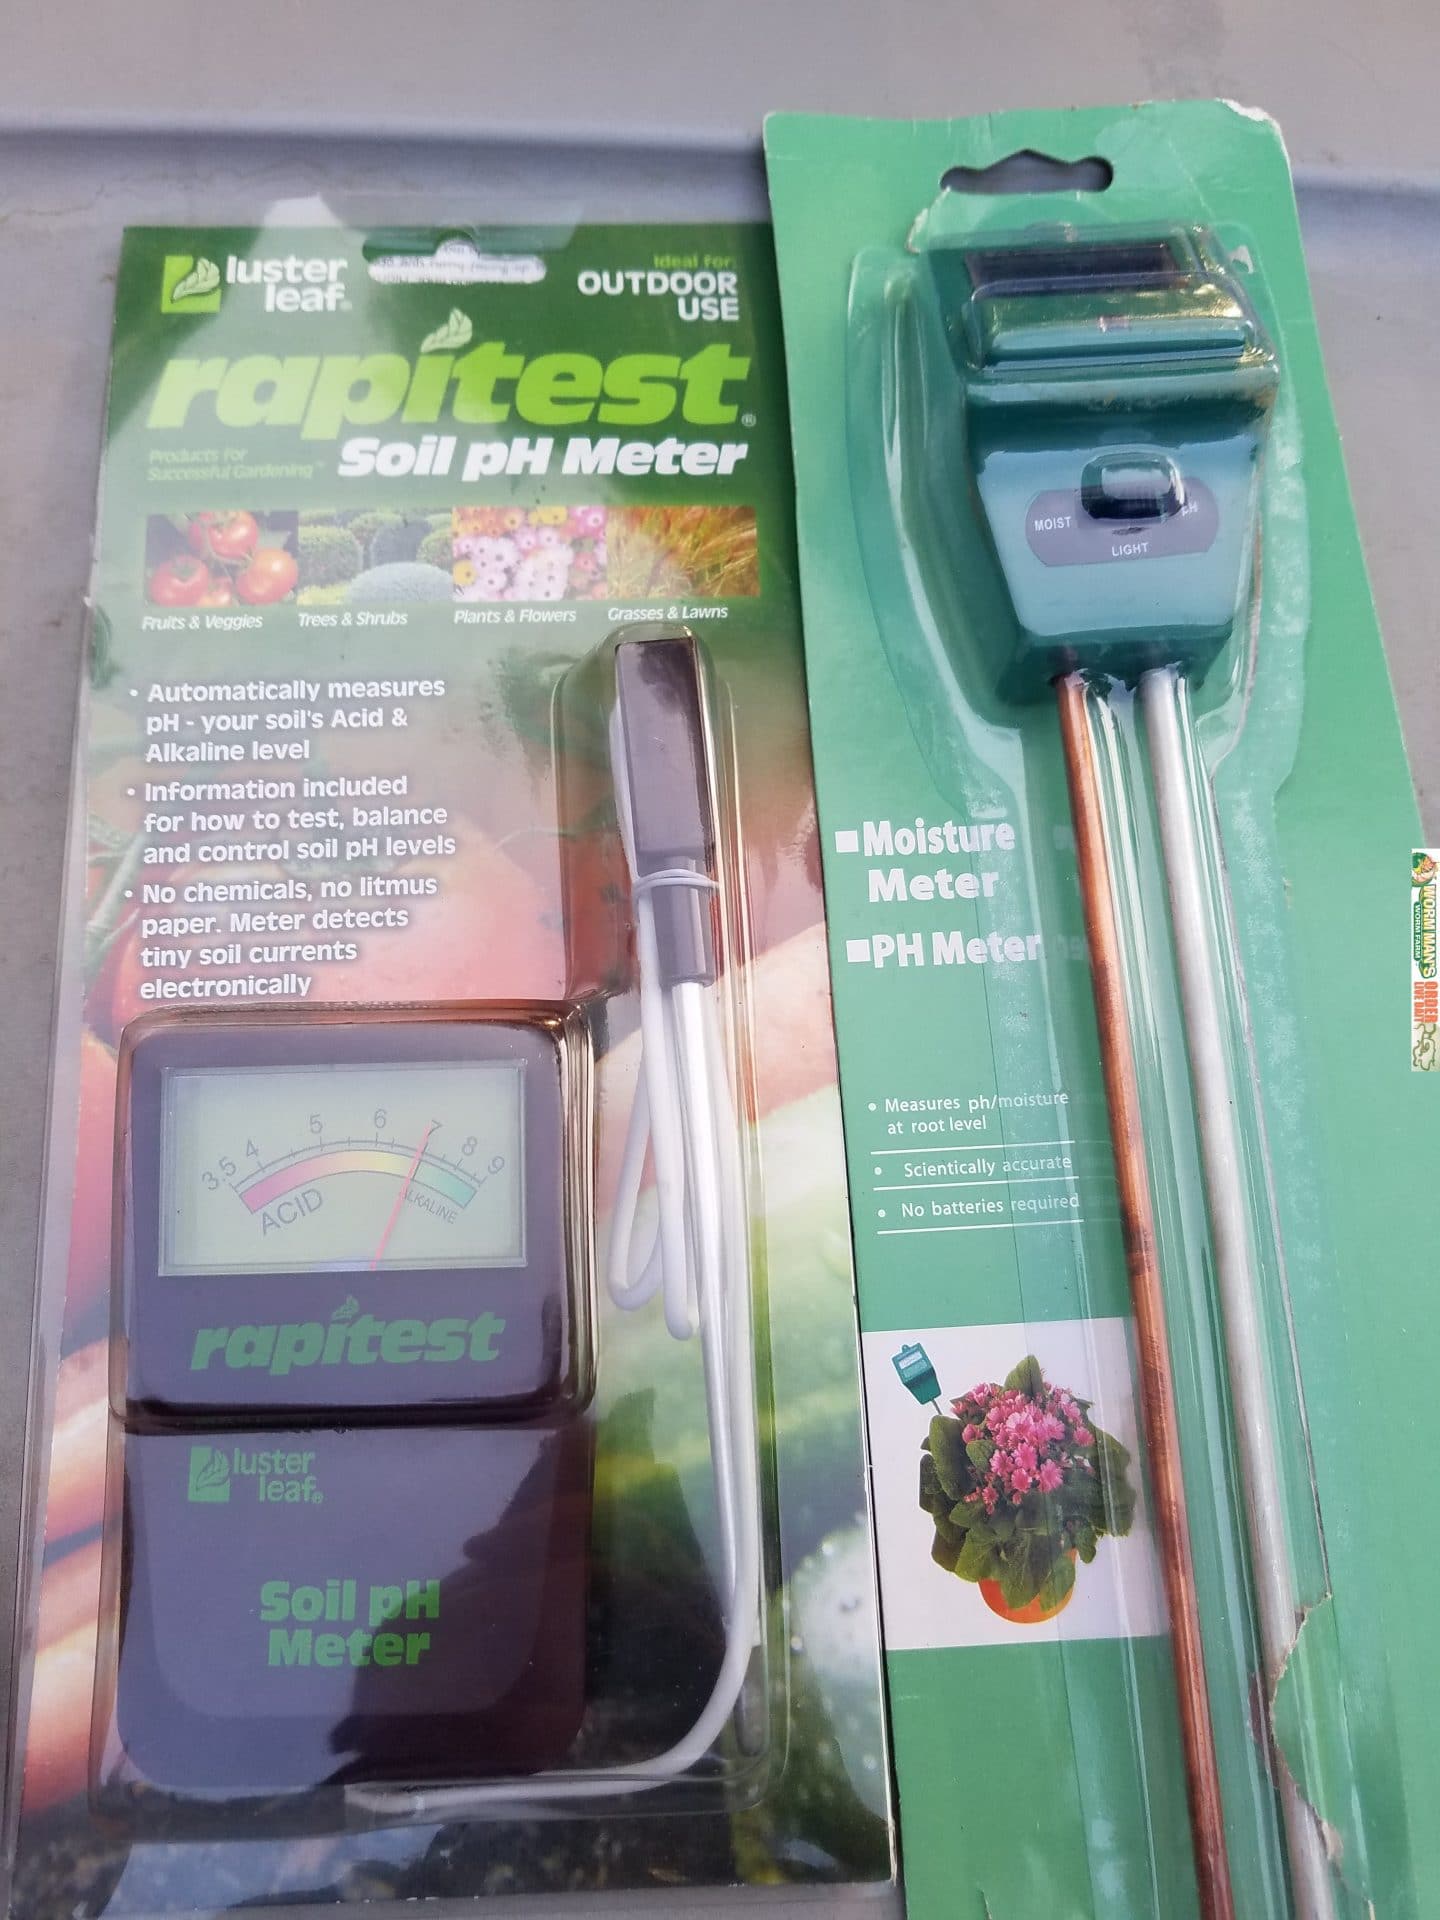
Where can I get a pH Meter?
You can get a pH meter at many farm and garden stores, from us or online. Please check out our meters or the ones at the links below.
This video and article is the first in a series that we will do on Blatticomposting. Please send us your questions or ask them below and we will incorporate the answers in the followup articles and videos.
I am sure that you have all heard of Vermicomposting, which is composting with worms. Redworm composting has been used for decades to help reduce household waste and create nutrient rich worm castings which are used to fertilize plants.
Well, times have changed and composting is still all the rage but now we are composting with roaches. This form of composting is called “Blatticomposting. Relax, these are not the roaches that infest homes and businesses. These are large roaches that are from tropical regions. The roaches that we use to compost are actually a species that cannot climb, so you can actually keep them in a plastic Rubbermaid container without a lid and they will not escape. The end product of the Blatticomposting process is frass (roach poop) which is a great natural fertilizer.
There are two types of roaches used in Blatticomposting. We use Pantanal Roaches(Eublaberus sp. “Pantanal”) and Ivory Roaches(Eublaberus sp “Ivory” ). Both are related as they are from the same genus, Eublaberus.
Both Pantanal and Ivory are burrowing roaches and love to dig in substrate. We use a layer of coconut coir. They also love to eat food scraps and will swarm fruits, vegetables and even meat scraps.
These are tropical roaches so they like it room temperature or above, so a kitchen composter or a composter near a furnace will keep this composting team kicking.
I will post more information on the care of both Eublaberus species soon. I just wanted to send out a Blatticomposting introduction. We own the name Blatticomposting.com and we will be offering both types of roaches for sale very soon, with free information on making composting units to house them in.
You order your Superworms, the arrive and then, as you are opening your Super Worm box, that you don’t know how to care for them. You scramble for your phone, search for “Superworm Caresheet” and find a bunch of stuff. You grab some oat meals, throw in some apple s
ces and then put them in the refrigerator. You come back later and they are all dead. Believe it or not, we have had people contact us with this exact scenario, so we created this video and quick post.
Superworms are easy to care for. You just need some wheat bran, a potato and a plastic shoe box.
You don’t put the lid on the shoe box because the heat from the worms and the potato slices will cause the box to sweat and that will cause the worm bedding to mold. This could also cause mites to grow in your super worm culture.
NEVER PUT THEM IN THE REFRIGERATOR. Cold kills Superworms.
That is all you need to do. Now watch the video where I tell you the same thing that I just told you. 🙂 If you need Superworms or bran please try Wormman.com
What can you use besides wheat bran as your superworm bedding? You can use chicken food. Egg layer mash that is used to feed egg layer chickens is a good food for Super Worms. Some people use oat meal or other grains to as a bedding and then feed a variety of vegetables to the superworms to ensure that they get everything that they need.
We have tried various grains and nothing grows super worms the way regular wheat bran does. We do use small amounts of yeast as a nutrient when feeding our superworms. They love it and it is good for them and for us.
If you are interested in breeding your own superworms, then you should try our Superworm Breeding kit.
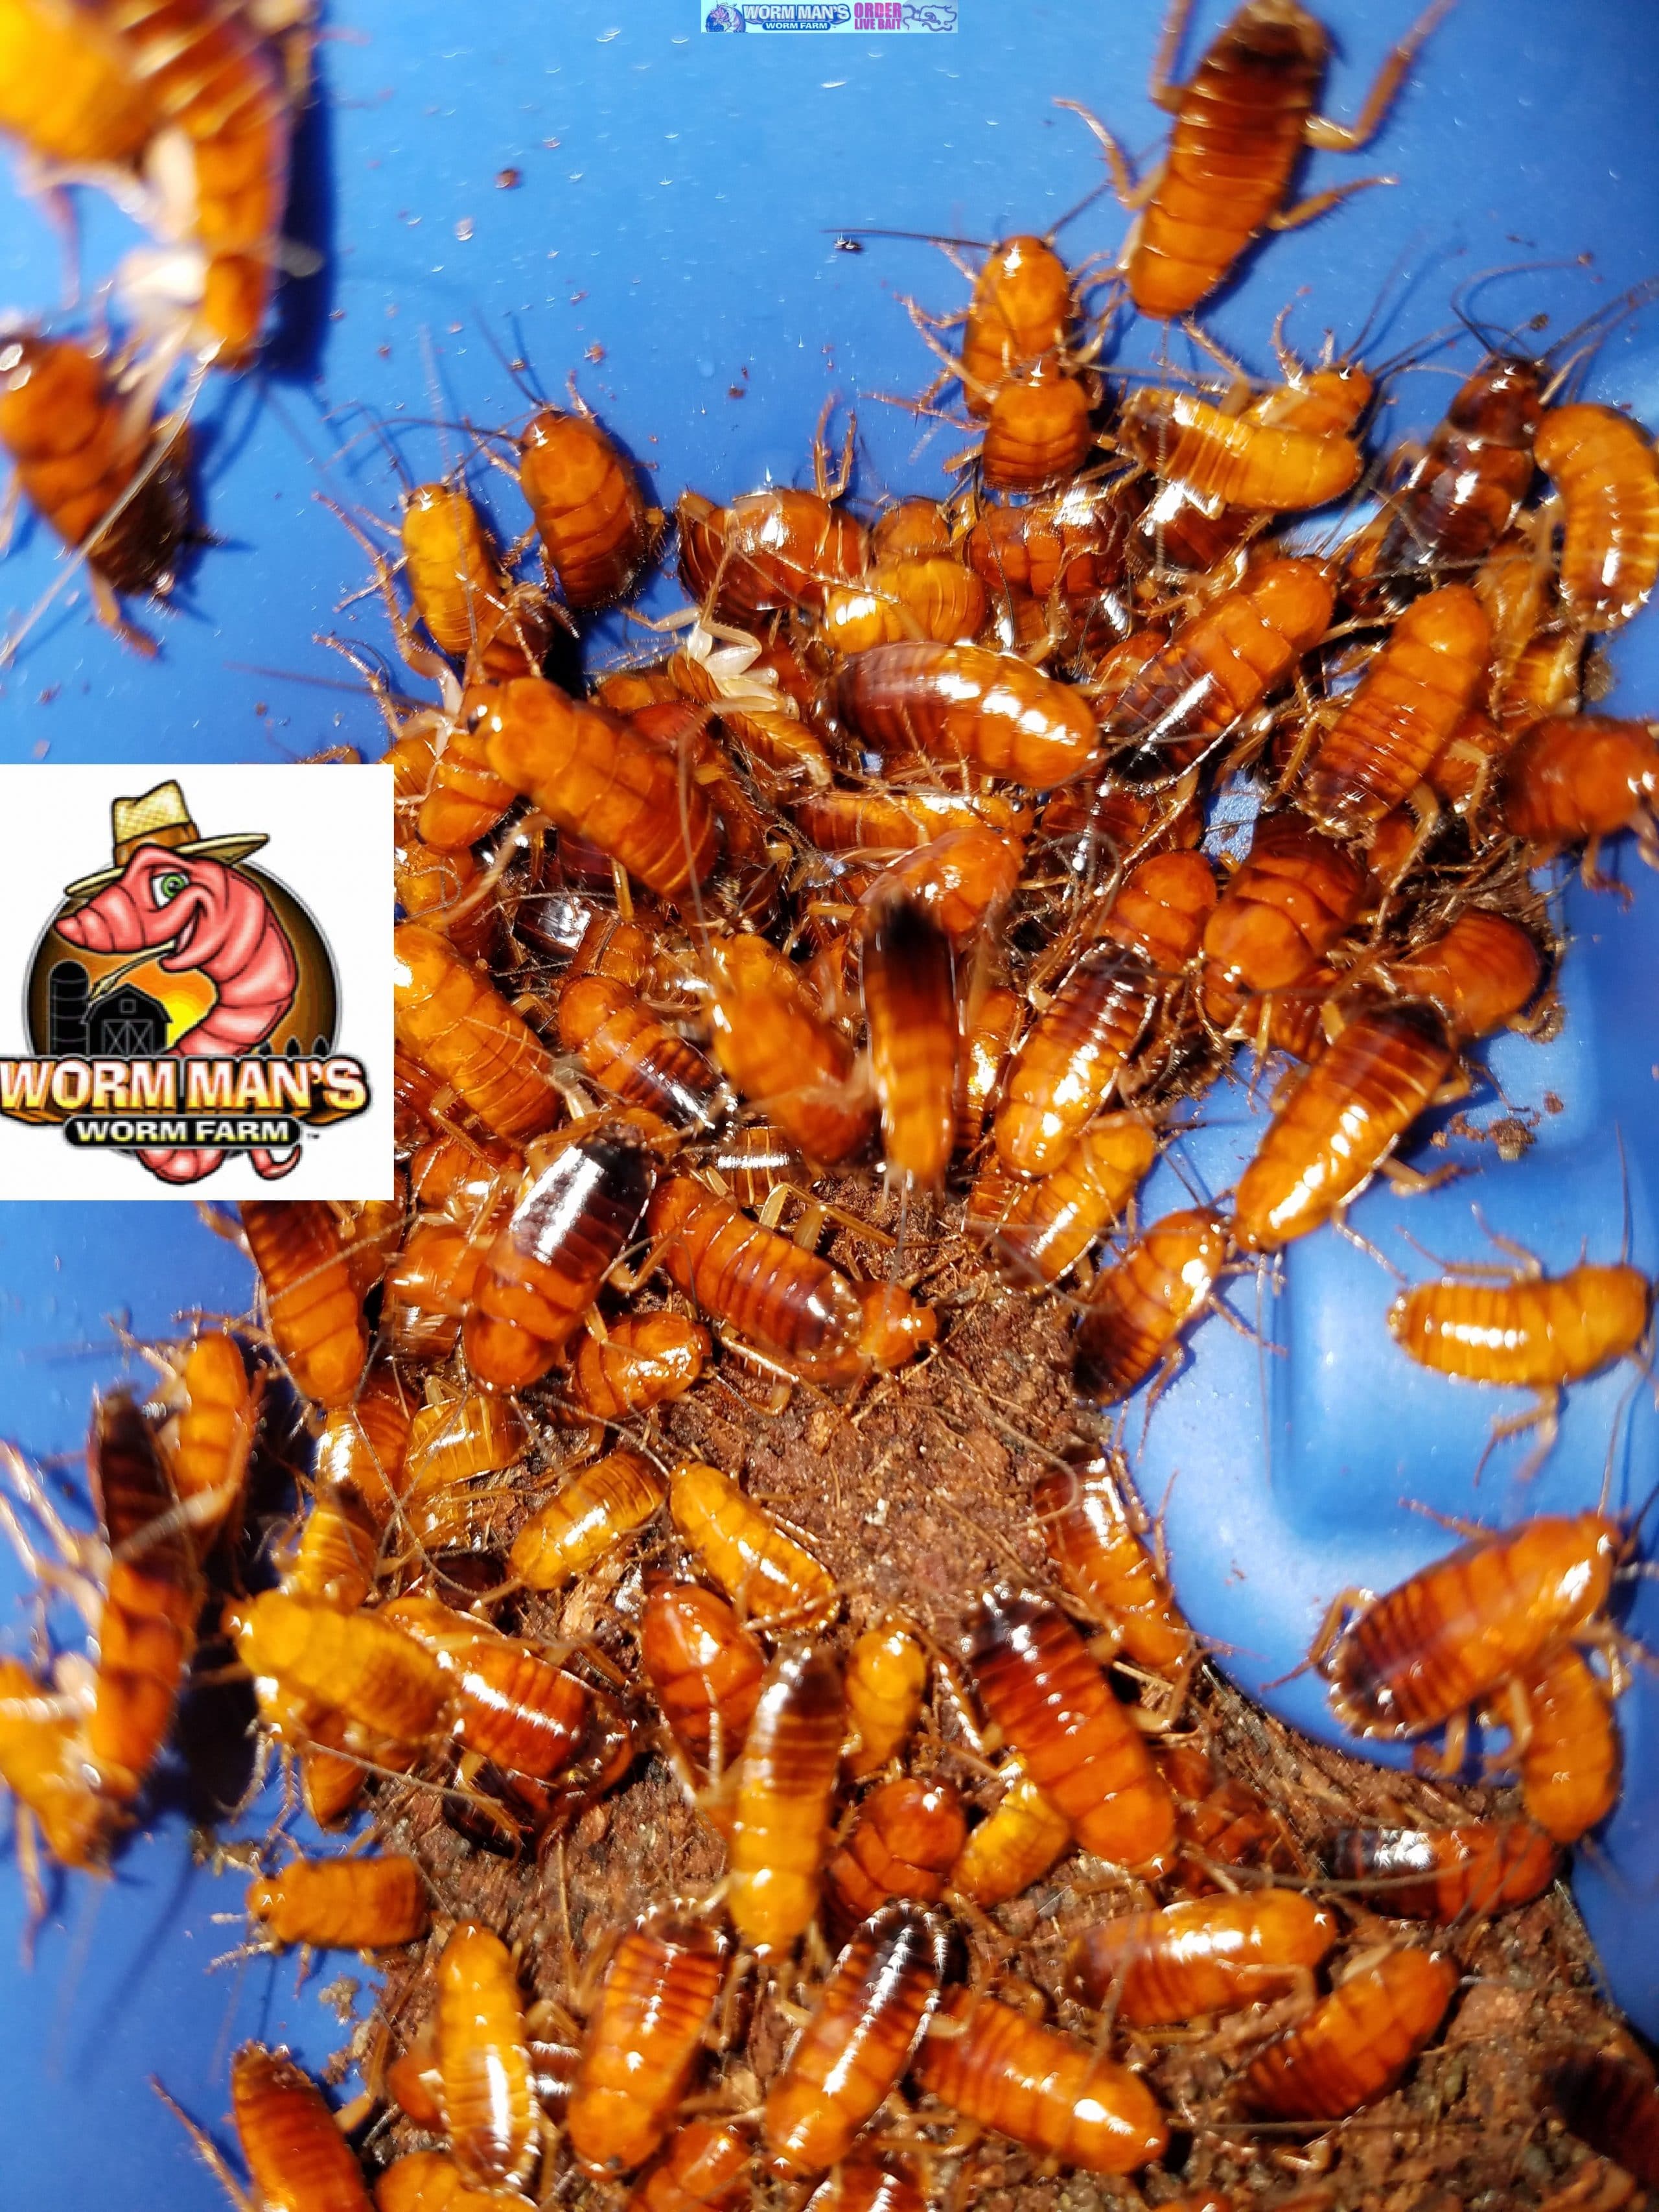
Blatta Lateralis, also known as Turkistan Roaches, Red Runners and a few other names, is a very easy roach to house and breed if you have proper temperatures.
Would you like to see 30,000 Red Runner Roaches in one Rubbermaid container? Check out our video.
Turkistan Red Runner Roach
Scientific Name
Blatta Lateralis
Sizes
Up to one inch as
an adult. Nymphs are about 1/8″.
Life Cycle
Nymphs mature at 3
to 5 months. Adults live 6 to12 months
Reproductive Capacity
Egg cases laid
every 2 weeks. The 20 to 30 eggs hatch in 1 to 4
months.
Housing
Smooth sided
container with cover and egg crates stacked vertically.
Coconut
Coir substrate and leaf litter. Also provide hiding
places like small logs or tree bark.
Interesting Information
Sexing
Males
and females look similar with the female being rounder.
Origin
Southern
Africa
Foods
Fresh
fruit and vegetables. They love carrots, wet dog/cat
food and moist cereal. Limit wet grain based food to
what they will eat at any one time so that you do not
attract pests like flies and mites.
Water
Always keep water
crystals present in a cup. You can get that here
under the brand name, Cricket
Crystals.
Housing, Humidity and Temperature
Aquarium or plastic
container with air holes and a lid. High humidity with
good ventilation. 85 to 95 degrees
Please check out https://www.Invertebrateauction.com if you are looking to buy and sell your own invertebrates. Dismiss
Home
We are glad you are here. It gets lonely just talking to worms, crickets and fruit flies all day. Please engage with me, ask me a question or post a comment. Check out our forum and our directory. If you need worms, roaches or any type of feeder insects, please try Wormman.com


You must be logged in to post a comment.