Posted on Leave a comment

Make Your Own Red Worm Bedding

Breeder bins

 Red Worm Bedding

Breeder bins
Worm-Safe Bedding and Red Worm Breeding bin

Worm bedding need not be the big secret that it is.  The type of worms you wish to grow will dictate the type of bedding you will need. 

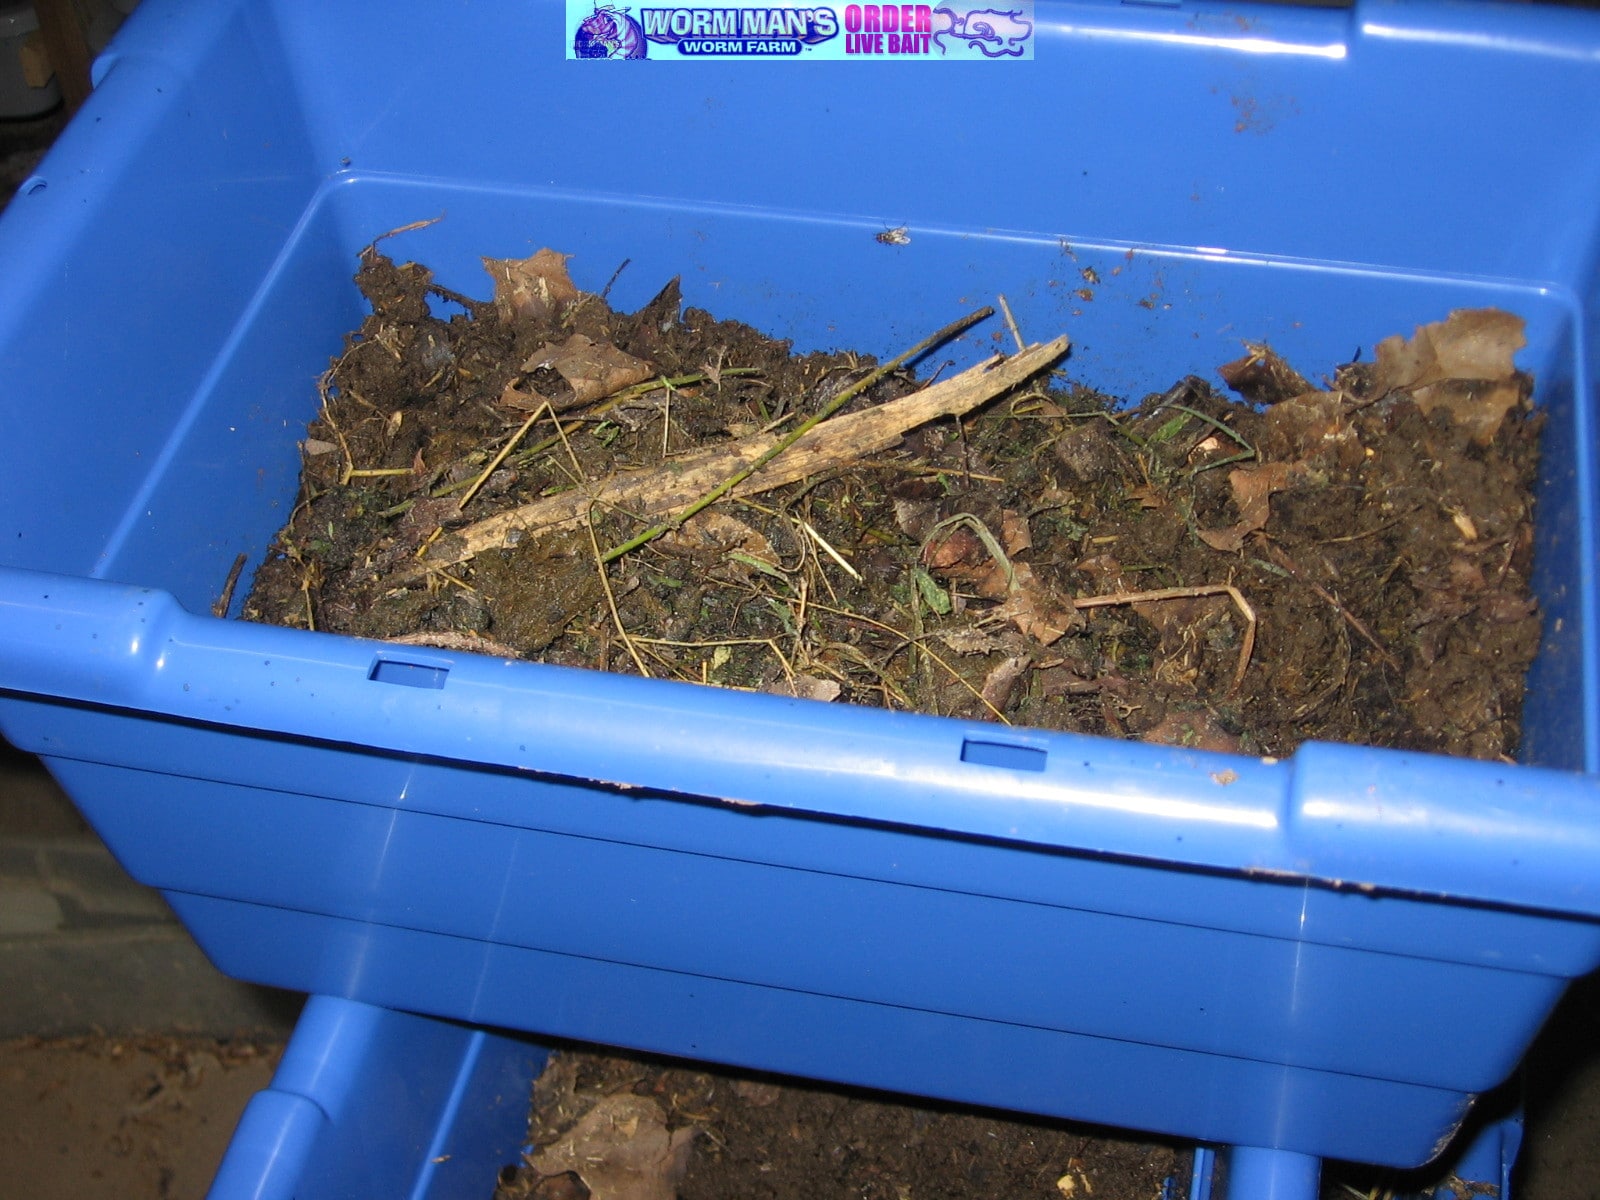
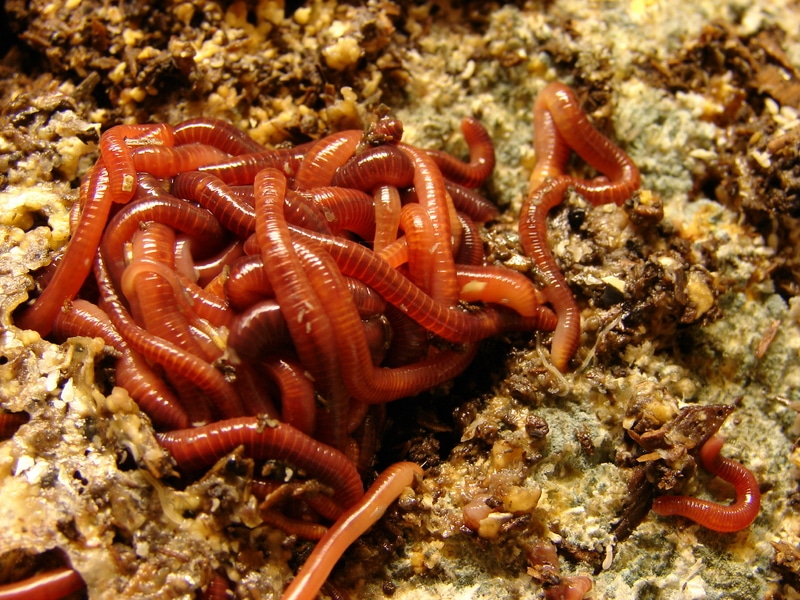
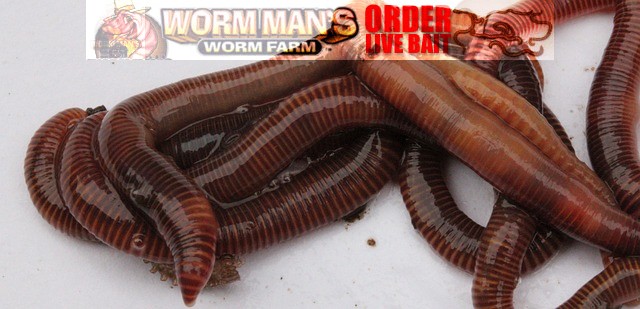
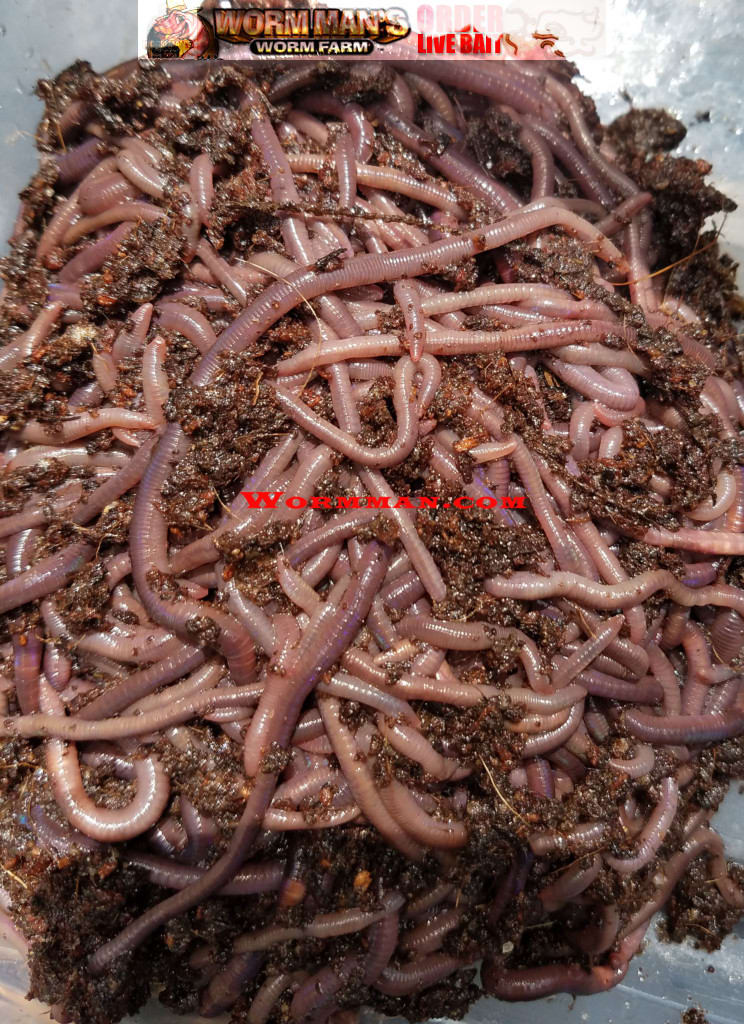
RED WORMS-  Red worms require a bedding made of manure and some other type of organic material.  We use 50% shredded paper to 50% manure.   We try to use as much rabbit manure as possible in our bedding mixture, but we also use cow, horse and poultry manure.   Please ensure that the manure has not been treated with dewormer or any type of insect killer.

An important thing to remember with the bedding is that is has to be past the heating stage.  Hot manure (fresh manure) needs to be composted a bit before your bedding is mixed.  Failure to do this will cause the bedding to heat, and your worms may die.  Another great bedding is shredded cardboard with manure.   Worms love paper bedding.  Shred the newspaper and then soak it.  After it is soaked let the water drip from it for a couple of minutes and place it in the beds or pits.   Mix in manure  and a you will have your bedding.  There are many different things that can be used for bedding.  If you remember the following you will be able to improvise:

Red worms need moisture at all times.  The more moisture the bigger they will become.  But remember to check the pH level.  Wet worm can become dead worm quickly.  Stay on top of the pH level.

If using grain, top feed your worms.  Many people believe that mixing feed in with the worms will work best.  I have found that top feeding with chicken layer mash works well.  Place in only enough feed for a day or so.  Do not mix the beds until the feed is gone.  This will stop the feed from getting mixed in, and causing the bedding to heat and sour.  Mixing feed into the bedding will cause the bedding to sour.   Sour bedding will kill worms.  Test your soil regularly with commonly bought pH Testers.  These testers are only a couple of bucks, and can be found at many feed and garden centers. Sprinkle pulverized limestone on top of the bedding after watering to control acid.. Soon, we will carry a line, so check in with our store often.

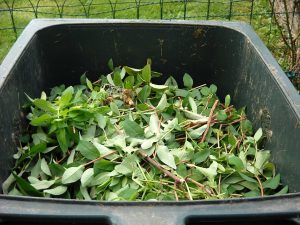
Alabama Jumbers, Jersey Jumpers-  Alabama Jumpers require a soil that is more course and dense.  A mix of 1/3 leaf mulch, 1/3top soil and 1/3manure works well.   My experience has shown me that Grays like moist beds and plenty of pulverized lime stone sprinkled on top.   Greys should also be top fed and not disturbed except once a month when you turn the beds over to get air in the beds.  Greys will eat small amounts of layer mash, but prefer leaves and grass clipping.  75-85 degrees for best results

Africans Night Crawlers-  Africans like bedding that is made like that used for red worms, but will only feed on the top.  Bedding for Africans does not have to be deep.  4″ is enough.  Use a mix of shredded paper and manure with straw for best results.  Africans need it wet and hot 75 to 90 degrees for best results.  Turn bedding weekly for air.  Africans cannot tolerate acid.  Use plenty of lime every week.  Feed chicken mash and manure. They love rabbit  and poultry manure.   Just watch the acid.

Northern Crawlers-  For these delicate creatures you must use caution.  They require top soil bedding and must be top feed.  the bedding must be moist but not wet.  These crawlers use burrows to live.  Heavy watering will cause them to drown.  Do not disturb these worms and they will breed.   Lightly sprinkle mash, leaves and grass on the top.  45-60 degrees is all they can tolerate.  The will do well and breed if kept with these guidelines.

Posted on Leave a comment

Troubleshooting Problems in Your Red Worm Composting Bed

Red Worms eating

Composting Worm Bed Troubleshooting

  • Common Worm Bin Problems and Solutions
Problem:
  • Worms crawling to the surface of the worm bed and dying.   This is called protein  poisoning by some.  This is really just putrification of the worm bedding.  This happens when there is too much water and too little air.  Remember that bedding should be moist but not wet.  The bin should smell Earthy and not like death.  You can save your worms if you just caught the problem now and some worms are still alive and healthy.
Solution:
  • Aerate the bedding immediately.  Add dry peat moss  or coir to the bedding and mix it in.  Add dry crumpled newspaper if you don’t have peat and coir. You can add newspaper even if you do have coir or peat.  Fluff the bedding and let the dry material act as airholes through out the worm bin or worm bed.
  • Remove and corn or bread products.  Worms can tolerate small amounts of bread and corn but too much will cause fermentation in the bedding. This will cause putrification.
  • Test for pH.  Anything above a 7 is too alkaline or below a 6 is too acidic.  Treat with powdered limestone.
Problem:
  • Worms are crawling off.
Solution:
  • If this is a new bin or bed of worms then they just might not be used to their home.  Red Worms and Euroworms will attempt to crawl off when they are first installed in their new home.  Especially after a long trip from our farm to yours.  The easiest cure is to put a light over the worm bin, worm bed or composting bin for a few days.  If the worms are well fed and the pH and conditions are right then the light will not be needed.  J
  • Just remember that worms will attempt to crawl if they are left in open worm bins outside in the rain.  If you can cover them they will not crawl off.  You can also put a two inch strip of wood around the top of the bin to as a crawl barrier.  The wooden slate would hang over the top of the worm bed with the lip hanging over on the inside of the bin.  The worms will crawl up and will not be able to go around the wood slat.  This is the best solution.
  • If the worms have been in the bed for a while you will want to check to make sure that your bedding is not acidic, that it is not anerobic or that the bedding is not used up.  If the bedding it powdery and there aren’t signs of food in the bed then it’s time to change the bedding and use the worm castings on your organic garden.  Worm castings are the best natural fertilzer known to mankind, wormkind and wormmankind. 🙂
Posted on Leave a comment

Wooden Worm Bed Plans

HOW TO MAKE and MAINTAIN A WORM BIN

This is a plan for a worm bed made out of wood.  I like wood because it breathes, wicks moisture and helps keep the bedding damp but not wet.

Red worms can survive a wide range of temperatures except freezing and temps above 82 degrees.  RED WORMS are at their most productive when the worm bin is at 55 to 77 degrees Fahrenheit.

Worms need to breathe so make sure you have plenty of air holes.  Especially if you are using a rubber maid container for a bin.

Red worms need moisture but not to much.  You should be able to squeeze a couple of drops from the bedding but not a stream

Here’s a list of what you’ll need: 2 pieces 5/8″ CDX plywood (35-5/8″ x 12″) *CDX is a special type of wood, ask your parents 2 pieces 5/8″ CDX plywood (23-3/8″ x 12″) 1 piece 5/8″ CDX plywood (24″ x 36″) 38 2″ ardox nails, hammer, drill with 1/2″ bit


. Nail the sides together with four to six nails per side, and then nail the bottom panel on using five to seven nails per side. Then get out the drill and make 12 half-inch holes in the bottom. That’s so that air can get in and water can get out. You’ll also have to raise the bin off the floor so that air can circulate up through them.

BEDDING:

bedding can be shredded cardboard or newspapers and old leaves. We use peat moss or leaves. Fill your bin to the top with the bedding. Add some dirt.  Like chickens, worms have gizzards that help them grind up all that organic matter you are feeding them.  Only use a couple of hands full of dirt.

The basic formula for the amount of worms you will need for your bin is two pounds of worms for every one pound of organic waste per week. (a 2:1 ratio). It takes about 1,000-1,500 worms to make a pound.

Posted on Leave a comment

Composting Worms Can Help Humanity Heal The Planet

We cannot ship to Hawaii because of their stringent laws prohibiting non-native insects and soil to be shipped to the island, and rightfully so.

If you live on the island of Hawaii, and you want to compost, there is a program available about healing the Earth through composting.  It looks like a great program.

Check it out here. 

Posted on Leave a comment

Boy’s Life Article That Boosted Wormman.com Owned by Ken Chiarella

Red worms

My name is Ken Chiarella.  I started Wormman.com in 1997.  Prior to that we were R&K Trading Company.  By 2000 we were doing about $150,000 in sales.  Most were online sales for red worms, but we also sold 1000 count worms in the back of many magazines.  This article in Boy’s live increased our business 5-fold.  It is just a small article about how to build a worm bed but we had people calling us from all over the world.  Those were the good ole days when the internet with young and I was too.  🙂

Enjoy the worm composting article here.

Red worms
Red Worms
Posted on Leave a comment

HOW TO START A WORM BED

BuBuild a Worm Composting Bin

This one is an old article that helped build Wormman.com back in the 1990’s.  Anyway, the instructions for composting with redworms are still good.  🙂
https://boyslife.org/hobbies-projects/projects/68/build-a-worm-bed/

Posted on Leave a comment

Worm Starter Kit. Great Composting Deal!

We are now offering a great worm composting starter kit so that you can get a jump on your summer garden starting right now.

If you are new to worm composting and want some awesome information while also getting started, then check out our kit.

Our free setup guide, that comes with the worm composting starter kit, is packed with information from bin setup to troubleshooting.

Check it out while supplies last.  Once the books and pH meters are sold out, we will not offer this again until 2019.


Posted on

Indoor Winter Worm Composting

Worm Composting

Today I am going to write about worm composting.

Keeping a compost pile going year round in New Jersey is a challenge, especially this year because we had almost two solid weeks at zero degrees.   If you’d rather not go out into the cold and snow to dumb your kitchen scraps on your rock solid, frozen, compost pile, consider setting up a worm composting system indoors. You can keep this going year round. Worms will process your kitchen, paper and cardboard scraps.

Start your vermicomposting project on a small scale, and expand as you learn. You can graduate to bigger and bigger worm bins, and more worms until you eventually graduate onto a multiple bin system, or even on to a large worm bed.

To get started, you’ll need a worm bin, some bedding, some water, the right kind of worms and some food.

Try a 10-gallon plastic tub for starters. You can get one from Walmart for $5.  Here is a video that I made about that. 

Drill 8 to 12 quarter-inch holes in the base of the tub for drainage, and then drill some half-inch holes along the upper edge on both sides for air circulation. Nest your tub into a plastic tray on top of blocks, or upside down plant pots in my case. Don’t worry that the worms are going to try to escape through the holes, they would rather stay in the bin unless there’s something very wrong inside the bin. Your bins should be no more than 18 inches deep so that the material in the bin doesn’t become too compacted. The worms need to be able to move freely through the bin, and they need plenty of air.

Bedding is the stuff in which the worms crawl around, and where you bury your food. It needs to be light and moist and fluffy. My favorite bedding is shredded newspaper with some shredded leaves or coconut coir added in.

The type of worms that you need for worm compost, or vermiculture are called Red Wiggler, or Eisenia fetida. They’re much smaller than earthworms, and they reproduce really well in captivity. They process a lot of organic matter, and they don’t mind being disturbed. Regular earthworms that you find in your garden will not work for composting. Those worms burrow very deeply in the cool soil, and they do not survive when kept in a container. You can order Red Wigglers from a garden supply catalog a bait shop, or here at Wormman.com

How many worms do you need, and what can you feed them? Get yourself a small kitchen scale, and weigh the food scraps that you generate every day for one week. That means fruit and vegetable scraps, coffee grounds, tea bags, and grains. No meat, bones, fatty products, or dairy. Worms can process about half their weight in food per day. If you generate an average of four ounces of food scraps per day, then you would need eight ounces of worms in your bin in order to process the food that you’re going to be adding on a daily basis.

Head on over to How Many Worms do I need and they will calculate it for you.

If you start with a smaller amount of worms, just feed them less. Their population will grow, and you’ll be able to feed them more over time. When you get your worms, you want to sprinkle them on top of the bedding. Remember, the bedding needs moist but not wet, and should be fluffy.

Then put the lid on the bin. They will quickly burrow down into the bedding. On your lid, take a piece of paper and draw a grid with eight equal sections. Every time you feed your worms, you’ll put the food in a different section, and you can mark the date that you put it then there. You’ll go in a clockwise direction around the bin. The worms will follow the food source. By the time you get back to that first spot, you should no longer recognize the food that you put in there. If you can still see recognizable food, then you shouldn’t put anymore in until it’s gone. I put eight ounces of worms in this moist bedding, and here I have four ounces of food scraps. I’m going to start in the section number one, just pull the bedding aside and bury the food shallowly.

That’s the extent of how you feed them. You put the lid back on, and put the bin in its nesting tray. Be careful that you don’t overload your bin with food. If you do, it can become smelly and you can develop a fruit fly problem. You want to go at the pace that the worms can consume. Take it slowly. It’s normal to see molds and very tiny creatures inside your worm bin. They’re all part of the worm bin web of life. Now here we’re fast forwarding to a bin that has been operating for several months. It looks quite different in here, much darker material. The bin will gradually fill with worm droppings or worm castings as they consume the food and the bedding that you put in here. This is a nutrient-rich material that you can put on your garden.

Once every few months, you’re going to need to harvest the castings from the bin, and then put the worms back in with fresh bedding to keep them going. Get yourself a sheet of plastic, and then scoop out the composted material. You can create a little windrow or some small cone-shaped piles. The worms that are in this material will quickly burrow down to the bottom of the pile.

They don’t like being exposed to light or dry air. One way to make them move a little more quickly is to set up a light and shine it right on the pile. You have to wait a few minutes, just continuously brush the composted material aside. The worms will continue to burrow down to the bottom of the pile to the point where eventually all you’ll have left is a pile of worms, and a separated pile of composted material.

The end product, or worm castings can go into your garden or be mixed with potting soil for houseplants.

If you are worried about flies, make sure that you bury your food scraps as outlined in the grid system above.


Posted on

From Garbage to Compost, The Gut Wrenching Tale of Casting Creation

All living creatures eat…most do anyway.   Carnivores like Meat while Herbivores are like leaves. But do you know who really takes the dirt cake? Detritivores: literally, trash eaters. They eat decaying matter like leaves, grasses, and manure.   Some of the best detritivores are Earthworms.

How does a slimey wiggly worm turn dead plants, decomposing animal bits, weird fungi, and even mold and manure into nutrient rich compost?

Let’s break down, and digest, the process of the worm’s end product.  Worm castings are formed after the worm food takes a straight shot from mouth to anus with a brief stop in the gizzard to be ground up and then the gut where the garbage is broken down.  Before we get to the chemistry, some biology and physics. Earthworms are part of a superfamily of invertebrates called megadriles that have fascinated Humans for centuries. Even Charles Darwin  wrote a book on the glorious creatures. As I said, worms process food in a straight shot: Their guts don’t twist and turn like ours. Up front is a toothless mouth, then a series of muscles that suck detritus in.

Just after the earthworm mouth is a curious set of glands that secrete a milky liquid containing calcium carbonate – the same stuff that makes up seashells. The dirt where worms make their home has a lot of CO2 in it which can impact a worm’s body chemistry, making its blood more acidic. So this gland is a  way for worms to balance out their CO2 with soil calcium, which, by the way, means less CO2 makes it into the atmosphere. Earthworms have a gizzard, too. Where churning muscles crush the incoming food thanks to bits of sand and rock the earthworm has sucked up. So the earthworm’s intestine receives some crushed dirt including plant bits like dead leaves and bark that no human could hope to digest. For us, a happy human gut is one that regularly has a bit of fiber pass on through. But earthworms eat almost entirely fiber, so how do they get any nutrients? Enter a quartet of enzymes: amylase, lipase, pepsin, and cellulase.

These specialized proteins chop and modify swallowed food into molecules the body can take in. We humans have three of these enzymes: amylase in our saliva breaks down starches. Worms just happen to keep their spit in their guts. Lipase breaks down fats so earthworms can digest plant oils. Then pepsin breaks down proteins to digest animal bits. But earthworms can make a dinner of all that vegetable-y fiber thanks to cellulase. As its name suggests, this enzyme breaks down cellulose, the hard fiber that gives leaves structure and lets trees stand tall with wood and bark. Given enough time, no dead tree is a match for Slimey! All forest litter is not a tasty dirt sandwich, however. Many plants contain toxins that defend them from hungry creatures. Polyphenols contain a class of toxic molecules that cause illness or death to insects. But earthworms, who can’t avoid munching polyphenols up, have molecules in their gut called drilodefensins. It seems only soil-dwelling megadriles contain drilodefensins, which is why they can chew right through those dead plants.

A few enzymes aren’t the only digestive trait we share with earthworms. We both have gut bacteria showing just how tiny microbes are. Not surprisingly, gut microbes in earthworms are soil bacteria that chew nitrogen out of the plant material, taking in nitrates and nitrites and expelling nitrogen gas in a process called denitrification. Which leads us to consider what comes out in the end … of the earthworm. Biologists call earthworm poop “castings”. Given what happens in worms’ guts, we here at Reactions call this chemically processed, calcium injected, black stuff, mana. So here’s why worm poop is a big deal. Earthworms munch up indigestible garbage and cast out soils that can support healthy ecosystems: Earthworms break down all that cellulose that could clutter up, then choke out forests. A herd of earthworms can munch over 20 tons of dead organic matter per acre per year: all around the world there are examples where they’ve transformed bad grazing land into bountiful fields. This is why composters love earthworms — they’re like earth’s little garbage people. Thanks little guys! Of course, it’s worth saying that there are invasive earthworms disrupting ecosystems in some places.

It’s not all sunshine and ponies in the earthworm world. The nitrogen returns to the atmosphere, eventually completing the nitrogen cycle, so other plants can mine that vital element anew and make food for organisms like us. And all those worms drill little tunnels through the soil to let air and water get deeper to feed strong roots of plants and trees.

What do you think?  Want to try your hand at vermicomposting?  Let us know below or go to http://www.wormman.com for some composting worms and supplies.

Posted on Leave a comment

Free Composting With Worms Ebook!

Learn the Basics of Composting With Worms. 


  • Use 3 Types of Worms and One Type of Fly Larvae to Compost your Food Scraps and Garbage
  • Learn how to make your first composting bin for $5.
  • Compost indoors or outdoors year round.
  •  …and more.

My name is Ken, I own Wormman.com, and I grow and sell bugs.  I started my business in 1995 after growing a large amount of red worms to fill my garden with worm castings. I love to garden and I bought some worms out of the back of a classified ad in a magazine.  I grew those worms by feeding them our food scraps and the manure from our bunnies.  I was soon inundated with worms, so I created more worm bins and expanded my garden. At one point, I had so many worm bins and beds that it was almost uncontrollable. I showed my wife, who does not share my passion for gardening or insects, and she said “you bought worms from a magazine. There has to be more people like you out there.  Sell the excess worms.” Genius!  Why didn’t I think of that?

The Internet was brand new back then, so I dialed into America Online and found that I could get 5 free websites just for being an AOL member.  Those weren’t responsive websites  like we have today.  In fact, it was a 3 page site.  The main page listed what I wanted it to say and the other two pages were for contact info and biographical information.  No shopping cart, no Facebook links, no social media at all because it did not exist yet.

The last 22 years have been a roller coaster.  I built the business to a million dollars in sales per year,  and then crashed it, fought through a cricket virus, a mealworm shortage, 9/11, and my own stupidity. (Scroll down for more...)

Check Our Our First Site and What AOL Looked and Sounded Like in Memory Lane:

My First Site 1995:


Nostalgia:  

Sounds of AOL 1995

AOL 1995
shadow-ornament

I have written a book called Profitable Worm Manual. The information above and much more is in that book We will have it available for download soon.  In the meantime, I wanted to offer you something free that I wish that I had when I started.  

Basic Worm Composting Free Ebook:

 Learn the basics of vermicomposting with this ebook.  I cover the basics on raising Red Worms, European Nightcrawlers and African Nightcrawlers.  I also cover composting with Black Soldier Fly Larvae. This ebook is yours free.   Please download it here.  I will also update you when my much bigger AND FREE 🙂  Profitable Worm Manual is released.  I will also send you periodic worm farming news if you want it.

Thank you!!
Ken

Learn The Secrets of Composting With 3 Types of Worms

Get Your Free Ebook and learn how to compost with Red Worms, European Nightcrawlers, African Nightcrawlers and one special chapter on composting with Black Soldier Fly Larvae.

privacy We value your privacy and would never spam you