I wrote a post about Tenebrio Obscurus a while back. You can find that post here. The gist of the post was that mini mealworms were named incorrectly and I cited sources. The common name for Obscurus is “Dark Mealworm. Dark Mealworms, it turns out, have never been sold in mass volumes. It is not even being grown by growers as feeders or in any fashion it seems.
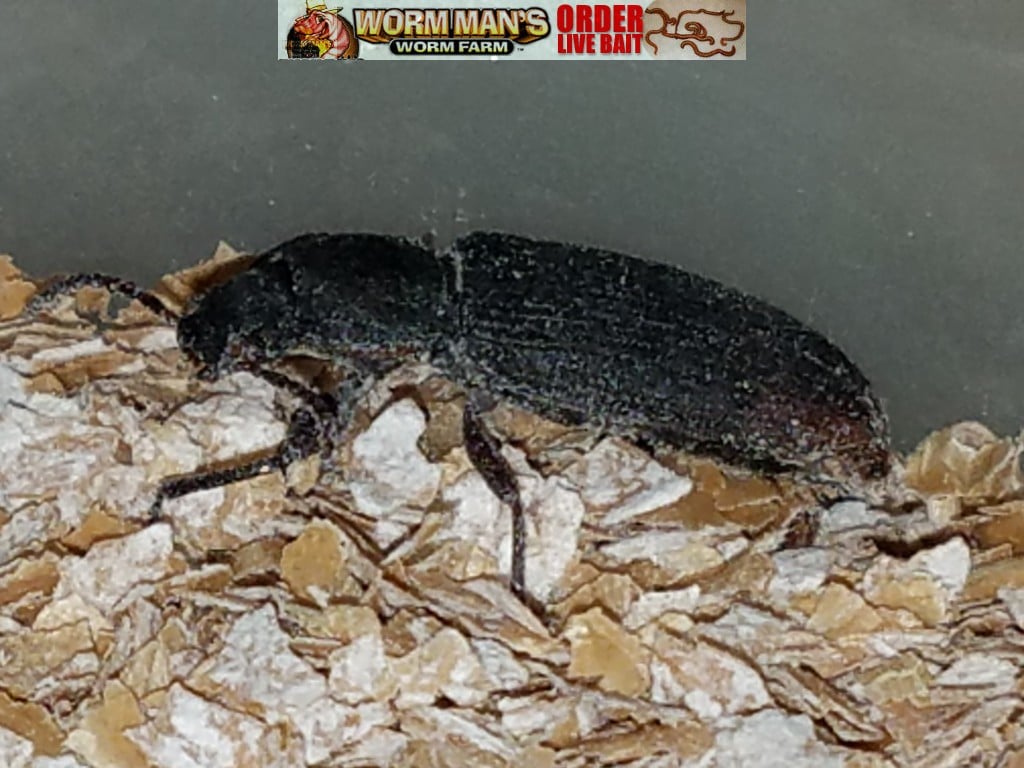
Dark Mealworms are the larvae of the adult Tenebrio Obscurus. Until recently, Buffalo Worms were mistakenly being sold as Tenebrio Obscurus, when they are actually Alphitobius diaperinus. Diaberinus is indeed a mini mealworm while Obscurus is a large mealworm. In the video, I place a golden mealworm beetle, Tenebrio Molitor, next to a Tenebrio obscurus beetle and you can see that Tenebrio obscurus, or the Dark Mealworm is a larger beetle.
I also place a large mealworm next to a Dark Mealworm and you can see that the largest large common mealworm is smaller than the Dark Mealworm larvae. The difference being that the Dark Mealworm is darker in color and has an exoskeleton that is more like that of Superworms, Zophobas morio.
Please see the pictures and watch the video below and comment.
For a few years a mealworm called Tenebrio Obscurus were all the rage. What was this mysterious smaller mealworm that Tenebrio Molitor and is it really raised differently? We bought some from a place in Florida and raised them. They ate, grew and were breeding just like regular mealworms, but they were smaller. They liked heat and we started finding them in manure piles, in our chicken coop and all over the place.
We kept track as the new worm increased in popularity and inquiries grew about weather Tenebrio Obscurus was really that or if it was actually a worm known as Buffalo Worms, Alphitobius diaperinus. The video below was one that we viewed as we sought the answer to the question of what these mini mealworms actually are.
After we had our worms and beetles identified by an Entomologist, we began a quest to find true Tenebrio Obscurus. We scoured the United States and could not find them until I ran into a guy who had P. Ornatus, High Yellow, isopods for sale. We got to talking and he told me that he had actual Tenebrio Obscurus.
He gave us several worms and we have begun our own Tenebrio Obscurus breeding program. It will take a while for Dark Mealworms, as true Tenebrio Obscurus are known, to be ready for sale, but we have them and they were reproducing. We plan to introduce them to insect world as soon as we have sufficient breeding stock.
Once we do, we will over these for sale and, probably for the first time, real Tenebrio Obscurus will be offered to the public as Dark Mealworms.
Here are some links to the actual worm below. Subscribe with the purple banner above to be contacted when we are in stock. Pictures will be posted very soon.
Thank you.
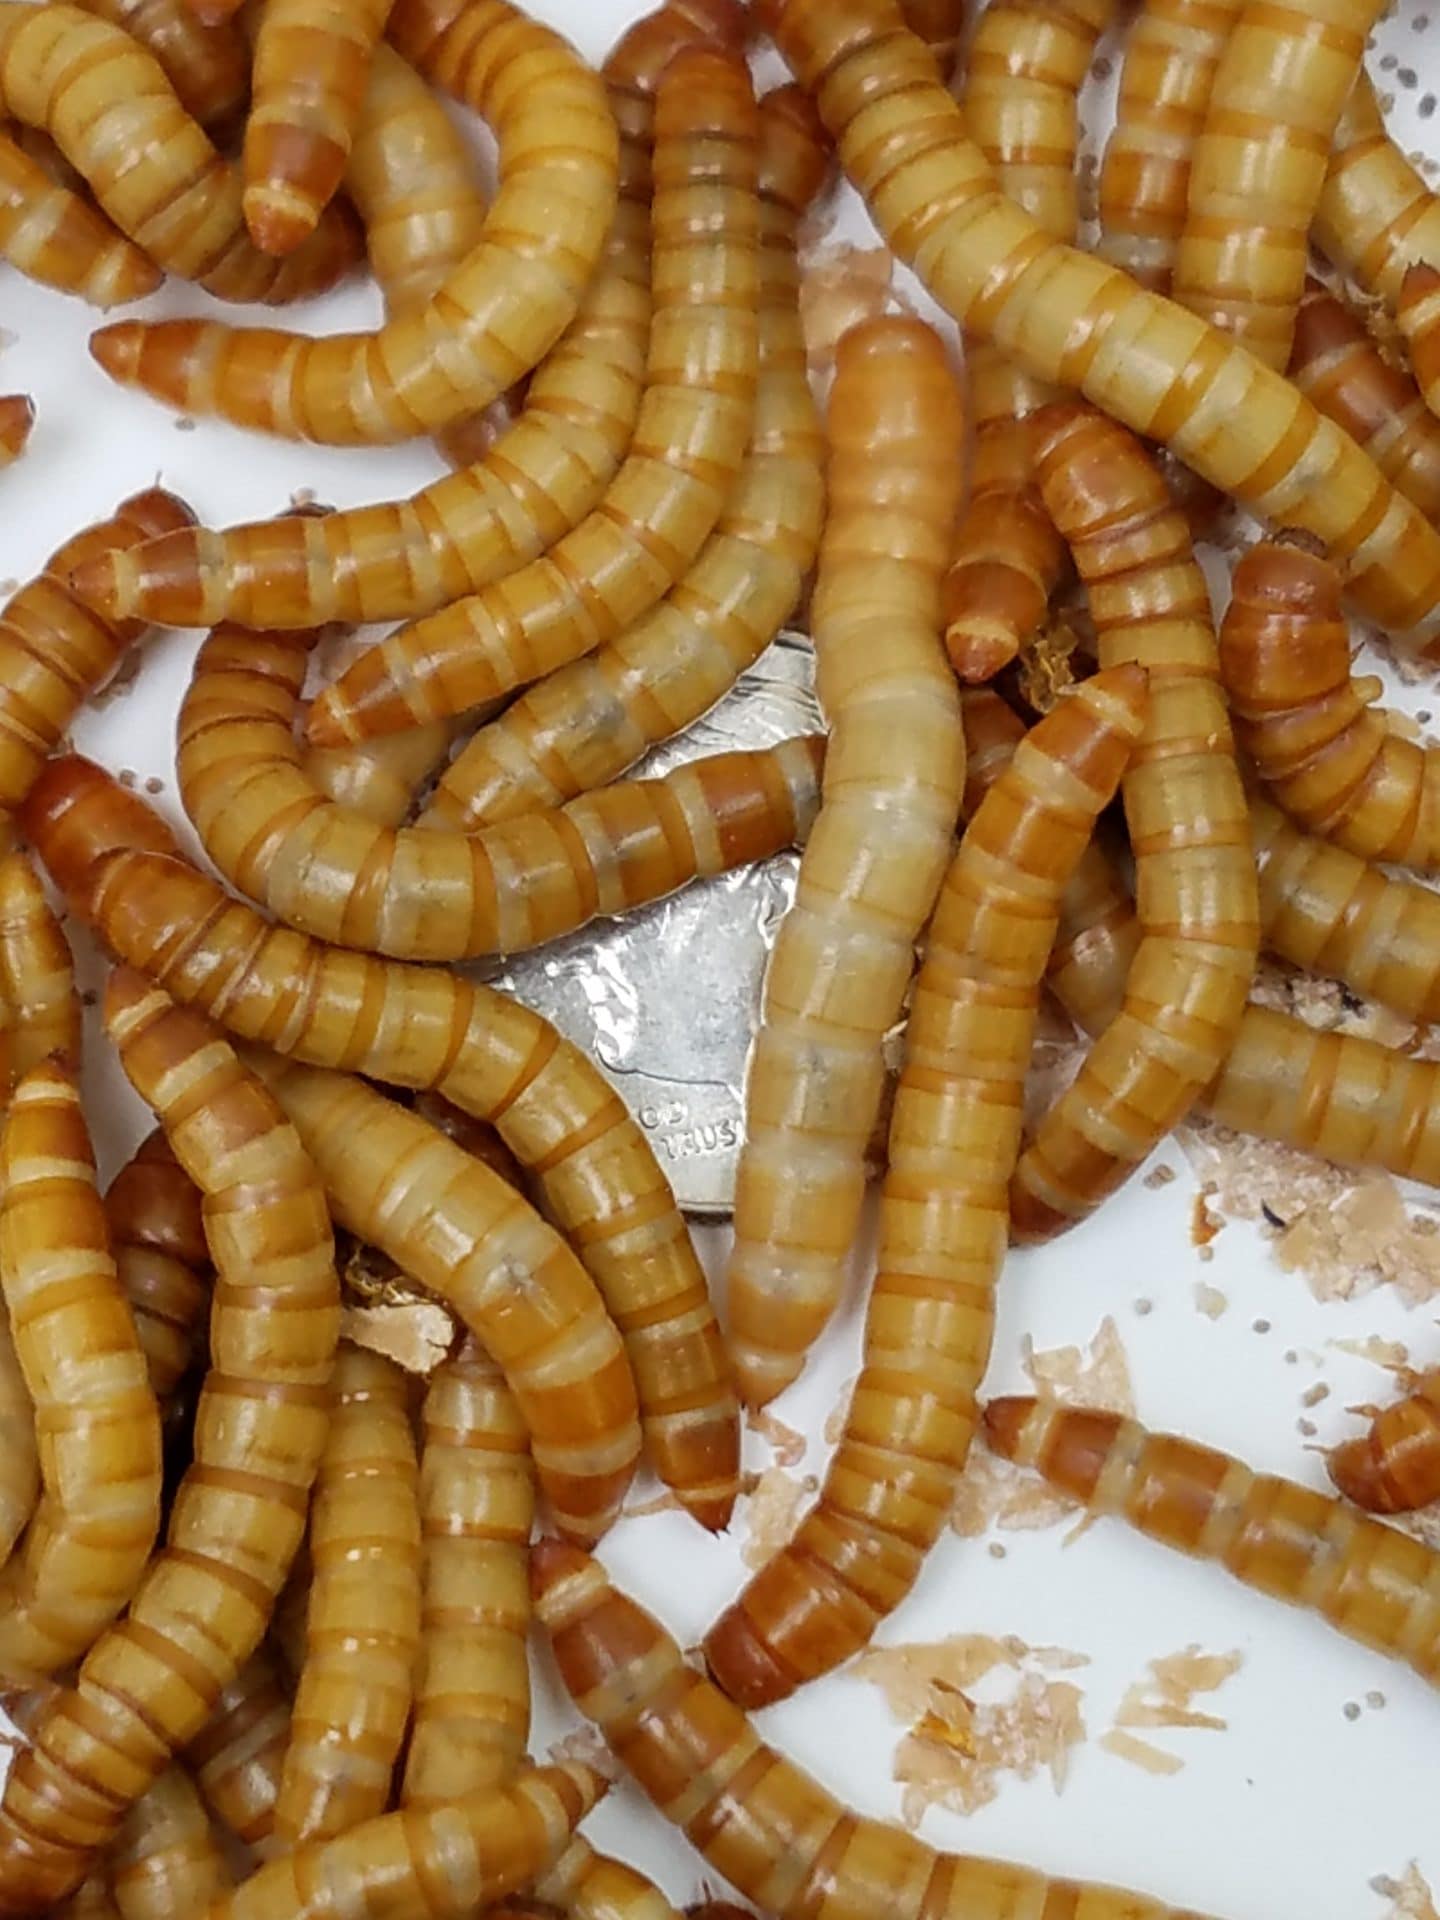
The interesting thing is the size. These are pictures of Giant Mealworms, Tenebrio Molitor with Dark Mealworms, Tenebrio Obscurus. They are nearly the same size and the Giant Mealworms are treated. Large mealworms are smaller than Tenebrio Obscurus. I can’t wait to get to the point where we can offer these to all of you.
3. You will need 2 shoe boxes. You will not need the lid unless you live in a very dry climate.
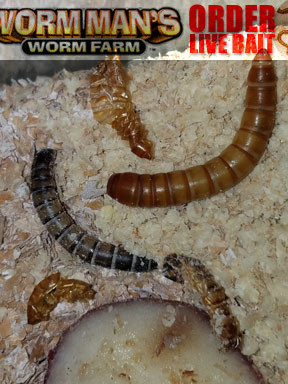
Mealworm Life Cycle:
Mealworms
Mealworm Pupa
Mealworm Beetles
Mealworm Breeding Instructions:
1. Retrieve your worms from the package and place them in one of the containers with about 1/4” of the bedding/food. You will not need the other container right now so store it in a safe place.
2. Feed the worms a slice of potato or cucumber. Please replace daily and throw away the old piece.
3. Let your worms eat the bedding and drink from the vegetable until the morph into beetles which should happen over the next couple of weeks.
4. Keep them worms in a warm place. Room temp or above, to about 85 degrees, will work well. Ensure that the bedding does not get wet or mold. You can do this by fluffing it weekly.
5. Your worms will morph into pupa and then they will becomebeetles. Remove the beetles from the container and place them in the second breeding container with ¼ “ of the wheat bran and give them a slice of potato.
7. Over the next couple of weeks the beetles will lay eggs in the bedding. After about a week, baby worms will be visible in the bedding, especially under the potato slices.
8. Just leave the beetles in that container and allow them to lay eggs until the die, which will take a couple of weeks
9. The worms will take a few weeks to grow out into large worms and then you will be able to repeat the process.
10. To size the worms, just move the beetles into a new container every week. You can use a shoe box or a Rubbermaid container. You do not have to do this but this will help you have the same size worms in each container. This is how the big superworm farms do it.
You can supplement their wheat bran bedding with non-medicated chicken feed, table bran, and things like whole grain cerial and oats.
At least I think that our new Super Worm Poop Product is exciting. We are having our vinyl stickers for the shaker bottles made now. Imagine the thrill of being able to shake Super Worm Poop over your garden soil and turn it into lush green plants, vegetables and fruit. Are you imagining it? Ahh!
Our company produces Superworms, mealworms on 100% Human grade table grains and vegetables from our farm. We grow potatoes, carrots, cucumbers and zucchini just for our worms. We do not use chemicals, pesticides or hormones for our Superworms or Mealworms, so you can be positive that the worm poop that goes into your garden is only 100% nutrient rich worm poop.
Benefits:
Not only is our Super Worm Poop loaded with nitrogen Super Worm poop enriches your garden soil and hydroponic systems with micro-organisms which will improve root structure and give your plants the push they need to be greener and healthier than ever.
Super Worm Poop is a natural source of chitin. Chitin is in the exoskeleton of our Superworms and Mealworms. As the worms grow, they shed and those skins also grind into the worm poop. The addition of chitin to hydroponic systems and garden soil can produce phenomenal results. Chitin works by encouraging the growth of chitin eating bacteria. This bacteria attacks many forms of harmful plant fungus and nematodes. Chitin can help flowering plants produce flowers and fruits, and can also help plants produce natural oils and resins. Think aromatic botanical and medicinal plants here.
The Science:
On anti-pathogenic effects:
“A Review of the Applications of Chitin and Its Derivatives in Agriculture to Modify Plant-Microbial Interactions and Improve Crop Yields”
Russell G. Sharp 2013
“Chitin and its derivatives have been repeatedly shown to protect crops from pests, pathogens and physiological disorders. A number of modes of action have been identified for the beneficial effects of chitin-based treatment on crops, including direct antibiosis and the induction of plant defences. However, their action in stimulating beneficial microbes has proved particularly impressive, with chitin/chitosan amplifying the effect of beneficial microbes in controlling pathogens, promoting plant growth and remediating soil pollutants. Combined, these effects of chitin addition and the subsequent responses of plants and microbes have led to improvements in disease control, plant growth, and ultimately improved crop yield and quality. The effectiveness of chitin-based treatments has been found to be comparable to those achieved with current synthetic pesticides and fertilizers. This effectiveness combined with the low cost, low concentration required, ample supply (recycled waste) and health/environmental safety lead to a forecast that a range of chitin-based/augmented products will become a more common feature in agriculture in the near future.”
How to use:
As a Hydroponic additive:
Mix 1-2 tbsp. of Super Worm Poop per gallon of nutrient solution. Keep well aerated.
For Indoor Plants:
Super Worm Poop can be mixed directly into the soil. Sprinkle the poop lightly on top of the soil on indoor plants. The Super Worm Poop nutrients will soak down thru the soil each time the soil is watered.
To Start Seeds:
The size and growth rate of seedlings and transplants will be remarkably improved when mixing 1 cup of Super Worm Poop to 1 cubic foot of seed starting mix.
In Your garden:
Super Worm Poop should be mixed directly into the soil. Simply lightly sprinkle Super Worm Poop around your plants right onto the soil using the shaker bottle your Super Worm Poop is delivered in. The wonderful nutrients will soak down thru the soil each time the soil is watered.
On Your Roses and Perennials:
Top dress roses and perennials with Super Worm Poop or mix into the soil above the roots.
Right on Your Established lawn:
Broadcast Super Worm Poop at a rate of 5 lbs of insect frass per 100 Sq. feet of lawn.
For New lawns:
Apply 5 Lbs. of Super Worm Poop per 100 sq. ft. of lawn. Work the Super Worm Poop into the top 2″ of the soil. Apply grass seed and water well.
Planting trees and shrubs:
Dig your planting hole. Apply 1/4″ of Super Worm Poop to the center of the hole and spread the plants roots over the insect frass. Insert your plant and fill the rest of the hole with fertile soil.
Super Worm Poop Tea:
We do not recommend drinking Super Worm Poop, but if you are fan of red worm compost tea, then you will love Super Worm Poop Tea. The tea can be used to fertilize house and garden plants while watering. You can also be spray the tea on plant leaves as a foliar fertilizer.
How to Make Super Worm Poop Tea:
Method 1: Soak 1 tbsp. of Super Worm Poop in one gallon of water for 24 hours. Strain the tea solution and dilute with water as necessary before use.
Method 2: Fill a 5 gallon bucket 1″ full of Super Worm Poop and then fill the bucket with water. Use a small aquarium pump with a bubbler to add oxygen to the solution. The tea should be allowed to steep with the oxygen bubbles for at least a few hours. Strain the tea solution and dilute with water as necessary before use.
For a microbial kick to your Worm Poop Tea, add 1/4 cup of molasses when brewing.
If you want to save a ton of time then invest the time in making some mealworm and superworm baskets for your worm breeding operation. We used to take hours to move beetles and mealworms one at a time until we made these beetle baskets. Now, what used to take us all day, takes us about 15 minutes to physically move all of our baskets to new trays of bedding.
I made a video showing you how to do it and I will also give you step by step instructions below.
You will need:
Dish Pans, which can be purchased for 5o cents to a dollar at most dollar stores.
Bins for holding mealworms and superworm breeding beetles
A roll of hardware cloth with small enough holes so that the beetles cannot get through but the bedding and eggs will still be able to be sifted out.
I plastic welder. I bought a bunch of the ones in the picture for about $13.
A glue gun that handles large glue stick.
Glue sticks.
Step 1: Cut out the bottom of the bins using the plastic welder.
Step 2: Use the bottom section that you cut out as a template and cut the hardware cloth about 1 inch larger than the section you removed so that the hardware cloth overlaps with the plastic on the bin. Step 3: Using the hot glue gun, glue the hardware cloth to the bottom of the bin.
Step 4: Watch the video and see our mealworm and Superworm beetle baskets in action.
I get asked every week how we make Giant Mealworms. Well, I decided to stop answering that question via email because I am going to share it right here for everyone to read.
Giant mealworms are treated with a growth regulator. I have become tired of seeing mealworm sellers state that they don’t use chemicals on their mealworms to get them to become giants. Of course, they do use chemicals. There isn’t any other way to do it.
We use a brand called Diacon II to spray on the beds of our giants. We never use the same bins for other mealworms and the giants are in a separate building so that we do not contaminate our breeding and pet supply stock.
Facts:
They cannot breed once treated because the treatment stops the mealworm from becoming a beetle. It interrupts the process and makes them grow larger instead.
The chemical is not toxic to pets or people, but it is still a chemical and I would not ingest it. I also would not feed them to my pets. I say that right on our site at http://www.wormman.com.
If you want big mealworms for reptiles and pets, then use large mealworms or get medium superworms. Both of those choices are not treated at Worm Man.
They do make awesome bait.
In order to purchase the chemical, one must be a certified and licensed pest control operator. I get recertified every 5 years in order to be able to by growth regulator.
Please check out https://www.Invertebrateauction.com if you are looking to buy and sell your own invertebrates. Dismiss
Home
We are glad you are here. It gets lonely just talking to worms, crickets and fruit flies all day. Please engage with me, ask me a question or post a comment. Check out our forum and our directory. If you need worms, roaches or any type of feeder insects, please try Wormman.com


You must be logged in to post a comment.