Posted on Leave a comment

The Dark Mealworm- Tenebrio Obscurus is not a Mini Mealworm

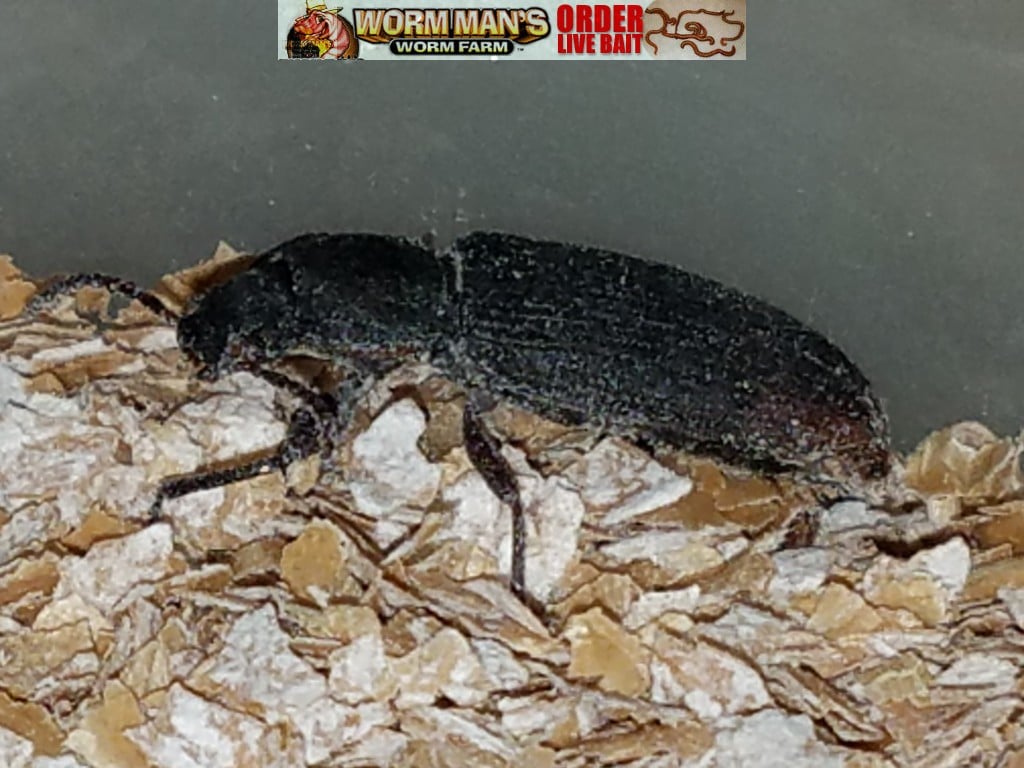
I wrote a post about Tenebrio Obscurus a while back.  You can find that post here.  The gist of the post was that mini mealworms were named incorrectly and I cited sources.    The common name for Obscurus is “Dark Mealworm.  Dark Mealworms, it turns out, have never been sold in mass volumes.  It is not even being grown by growers as feeders or in any fashion it seems.

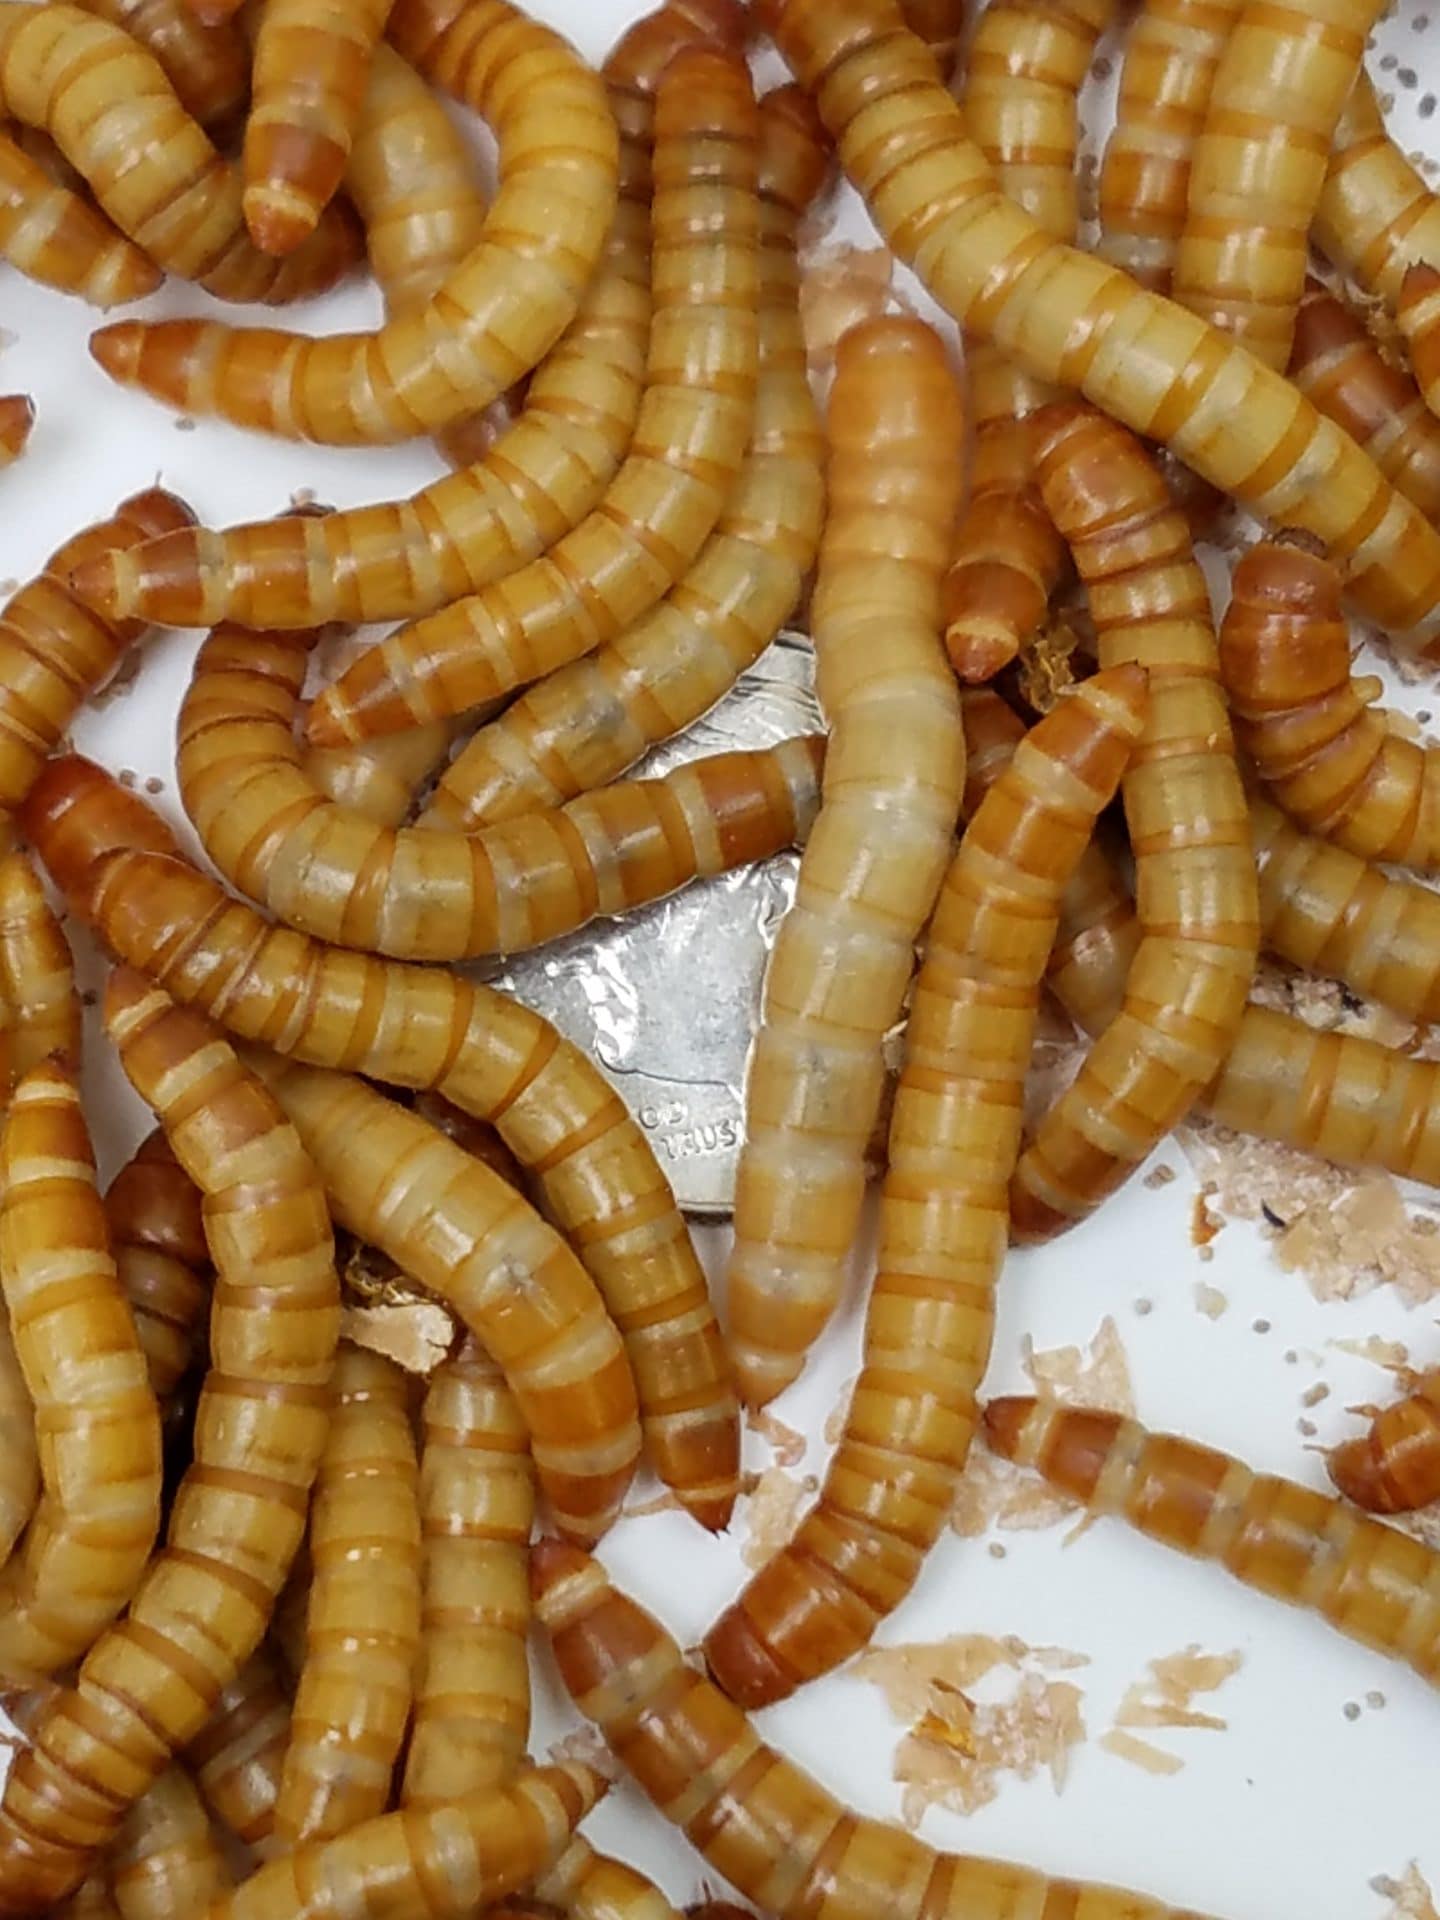
Dark Mealworms are the larvae of the adult Tenebrio Obscurus.  Until recently, Buffalo Worms were mistakenly being sold as Tenebrio Obscurus, when they are actually Alphitobius diaperinus.  Diaberinus is  indeed a mini mealworm while Obscurus is a large mealworm.  In the video, I place a golden mealworm beetle, Tenebrio Molitor, next to a Tenebrio obscurus beetle and you can see that Tenebrio obscurus, or the Dark Mealworm is a larger beetle.

I also place a large mealworm next to a Dark Mealworm and you can see that the largest large common mealworm  is smaller than the Dark Mealworm larvae.  The difference being that the Dark Mealworm is darker in color and has an exoskeleton that is more like that of Superworms, Zophobas morio.

Please see the pictures and watch the video below and comment.

Dark Mealworm next to Golden Mealworm

Posted on Leave a comment

How to Breed Mealworms Easily

Breeding your own mealworms can save you money and ensure that your pets and wild birds are getting the very best food.

What you will need:
1. Mealworms. Please get them from us. We have mealworms for sale and on sale here. 🙂

2. You will need a bedding/food source. We use wheat bran. You can also get that from us or from any farm and feed store.

3. You will need 2 shoe boxes. You will not need the lid unless you live in a very dry climate.

Mealworm Life Cycle:

Mealworm Breeding Instructions:

1. Retrieve your worms from the package and place them in one of the containers with about 1/4” of the bedding/food.  You will not need the other container right now so store it in a safe place.

2. Feed the worms a slice of potato or cucumber. Please replace daily and throw away the old piece.

3. Let your worms eat the bedding and drink from the vegetable until the morph into beetles which should happen over the next couple of weeks.

4. Keep them worms in a warm place. Room temp or above, to about 85 degrees, will work well.  Ensure that the bedding does not get wet or mold.  You can do this by fluffing it weekly.

5. Your worms will morph into pupa and then they will becomebeetles.   Remove the beetles from the container and place them in the second breeding container with ¼ “ of the wheat bran and give them a slice of potato.

7. Over the next couple of weeks the beetles will lay eggs in the bedding. After about a week, baby worms will be visible in the bedding, especially under the potato slices.

8. Just leave the beetles in that container and allow them to lay eggs until the die, which will take a couple of weeks

9. The worms will take a few weeks to grow out into large worms and then you will be able to repeat the process.

10. To size the worms, just move the beetles into a new container every week. You can use a shoe box or a Rubbermaid container. You do not have to do this but this will help you have the same size worms in each container. This is how the big superworm farms do it.

You can supplement their wheat bran bedding with non-medicated chicken feed, table bran, and things like whole grain cerial and oats.

You can also just get yourself a mealworm breeding kit from us and most of the work is done for you.  Plus, it comes with meal worms. We have Mealworm Breeding Kits for Sale here.