Worms crawling to the surface of the worm bed and dying. This is called protein poisoning by some. This is really just putrification of the worm bedding. This happens when there is too much water and too little air. Remember that bedding should be moist but not wet. The bin should smell Earthy and not like death. You can save your worms if you just caught the problem now and some worms are still alive and healthy.
Solution:
Aerate the bedding immediately. Add dry peat moss or coir to the bedding and mix it in. Add dry crumpled newspaper if you don’t have peat and coir. You can add newspaper even if you do have coir or peat. Fluff the bedding and let the dry material act as airholes through out the worm bin or worm bed.
Remove and corn or bread products. Worms can tolerate small amounts of bread and corn but too much will cause fermentation in the bedding. This will cause putrification.
Test for pH. Anything above a 7 is too alkaline or below a 6 is too acidic. Treat with powdered limestone.
Problem:
Worms are crawling off.
Solution:
If this is a new bin or bed of worms then they just might not be used to their home. Red Worms and Euroworms will attempt to crawl off when they are first installed in their new home. Especially after a long trip from our farm to yours. The easiest cure is to put a light over the worm bin, worm bed or composting bin for a few days. If the worms are well fed and the pH and conditions are right then the light will not be needed. J
Just remember that worms will attempt to crawl if they are left in open worm bins outside in the rain. If you can cover them they will not crawl off. You can also put a two inch strip of wood around the top of the bin to as a crawl barrier. The wooden slate would hang over the top of the worm bed with the lip hanging over on the inside of the bin. The worms will crawl up and will not be able to go around the wood slat. This is the best solution.
If the worms have been in the bed for a while you will want to check to make sure that your bedding is not acidic, that it is not anerobic or that the bedding is not used up. If the bedding it powdery and there aren’t signs of food in the bed then it’s time to change the bedding and use the worm castings on your organic garden. Worm castings are the best natural fertilzer known to mankind, wormkind and wormmankind. 🙂
This is a plan for a worm bed made out of wood. I like wood because it breathes, wicks moisture and helps keep the bedding damp but not wet.
Red worms can survive a wide range of temperatures except freezing and temps above 82 degrees. RED WORMS are at their most productive when the worm bin is at 55 to 77 degrees Fahrenheit.
Worms need to breathe so make sure you have plenty of air holes. Especially if you are using a rubber maid container for a bin.
Red worms need moisture but not to much. You should be able to squeeze a couple of drops from the bedding but not a stream
Here’s a list of what you’ll need: 2 pieces 5/8″ CDX plywood (35-5/8″ x 12″) *CDX is a special type of wood, ask your parents 2 pieces 5/8″ CDX plywood (23-3/8″ x 12″) 1 piece 5/8″ CDX plywood (24″ x 36″) 38 2″ ardox nails, hammer, drill with 1/2″ bit
. Nail the sides together with four to six nails per side, and then nail the bottom panel on using five to seven nails per side. Then get out the drill and make 12 half-inch holes in the bottom. That’s so that air can get in and water can get out. You’ll also have to raise the bin off the floor so that air can circulate up through them.
BEDDING:
bedding can be shredded cardboard or newspapers and old leaves. We use peat moss or leaves. Fill your bin to the top with the bedding. Add some dirt. Like chickens, worms have gizzards that help them grind up all that organic matter you are feeding them. Only use a couple of hands full of dirt.
The basic formula for the amount of worms you will need for your bin is two pounds of worms for every one pound of organic waste per week. (a 2:1 ratio). It takes about 1,000-1,500 worms to make a pound.
Today is 12-14-2019, and it is 4 AM. The early bird may get the first worm, but the early worm farmer gets the worms fat so that the early bird gets fed. That was wordy.
Anyway, it is going to be warmer today, and we had a soaking rain last night, so we are opening our beds to check the worms and give them a good feeding, if needed, so that they can eat and then go back to bed when the cold hits again shortly.
These intermittent, cold weather feedings, allow us to check on our worms to ensure that pests have not invaded and that our worm herd is alive and well. The blanket of food will also heat a bit as it breaks down and that will help keep the worms warm enough to keep feeding and fattening so that the spring warmth will give them ample food supplies to grow and breed.
We feed them a mix of green and brown organic matter, so straw and alfalfa mixed with rabbit manure and frass from our mealworm and superworm operations. The worms love it and it heats well.
We feed by placing a strip of food down the center of our beds but we are sure to leave the sides food free so that the worms can escape the food if is should sour or heat too much on warmer days.
We also provide our indoor breeder and hatching beds with a good sprinkling of Purina Worm Chow. We do this weekly to keep our indoor breeders and hatchlings happy and healthy.
Worm-Safe Bedding and Red Worm Breeding bin
It is now 4:06 AM and I have to get to work. Have a great weekend.
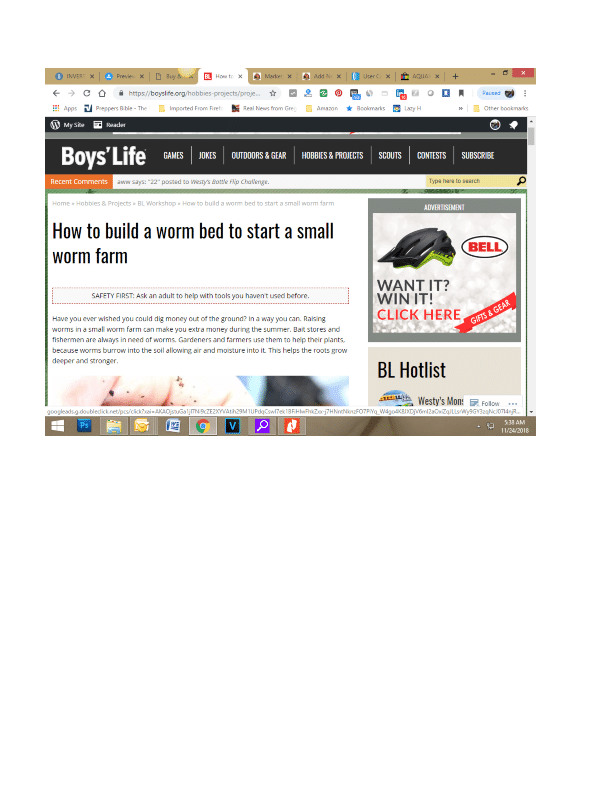
My name is Ken Chiarella. I started Wormman.com in 1997. Prior to that we were R&K Trading Company. By 2000 we were doing about $150,000 in sales. Most were online sales for red worms, but we also sold 1000 count worms in the back of many magazines. This article in Boy’s live increased our business 5-fold. It is just a small article about how to build a worm bed but we had people calling us from all over the world. Those were the good ole days when the internet with young and I was too. 🙂
This one is an old article that helped build Wormman.com back in the 1990’s. Anyway, the instructions for composting with redworms are still good. 🙂
https://boyslife.org/hobbies-projects/projects/68/build-a-worm-bed/
Keeping a compost pile going year round in New Jersey is a challenge, especially this year because we had almost two solid weeks at zero degrees. If you’d rather not go out into the cold and snow to dumb your kitchen scraps on your rock solid, frozen, compost pile, consider setting up a worm composting system indoors. You can keep this going year round. Worms will process your kitchen, paper and cardboard scraps.
Start your vermicomposting project on a small scale, and expand as you learn. You can graduate to bigger and bigger worm bins, and more worms until you eventually graduate onto a multiple bin system, or even on to a large worm bed.
To get started, you’ll need a worm bin, some bedding, some water, the right kind of worms and some food.
Drill 8 to 12 quarter-inch holes in the base of the tub for drainage, and then drill some half-inch holes along the upper edge on both sides for air circulation. Nest your tub into a plastic tray on top of blocks, or upside down plant pots in my case. Don’t worry that the worms are going to try to escape through the holes, they would rather stay in the bin unless there’s something very wrong inside the bin. Your bins should be no more than 18 inches deep so that the material in the bin doesn’t become too compacted. The worms need to be able to move freely through the bin, and they need plenty of air.
Bedding is the stuff in which the worms crawl around, and where you bury your food. It needs to be light and moist and fluffy. My favorite bedding is shredded newspaper with some shredded leaves or coconut coir added in.
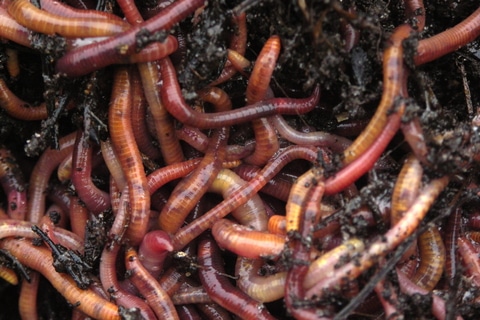
The type of worms that you need for worm compost, or vermiculture are called Red Wiggler, or Eisenia fetida. They’re much smaller than earthworms, and they reproduce really well in captivity. They process a lot of organic matter, and they don’t mind being disturbed. Regular earthworms that you find in your garden will not work for composting. Those worms burrow very deeply in the cool soil, and they do not survive when kept in a container. You can order Red Wigglers from a garden supply catalog a bait shop, or here at Wormman.com
How many worms do you need, and what can you feed them? Get yourself a small kitchen scale, and weigh the food scraps that you generate every day for one week. That means fruit and vegetable scraps, coffee grounds, tea bags, and grains. No meat, bones, fatty products, or dairy. Worms can process about half their weight in food per day. If you generate an average of four ounces of food scraps per day, then you would need eight ounces of worms in your bin in order to process the food that you’re going to be adding on a daily basis.
If you start with a smaller amount of worms, just feed them less. Their population will grow, and you’ll be able to feed them more over time. When you get your worms, you want to sprinkle them on top of the bedding. Remember, the bedding needs moist but not wet, and should be fluffy.
Then put the lid on the bin. They will quickly burrow down into the bedding. On your lid, take a piece of paper and draw a grid with eight equal sections. Every time you feed your worms, you’ll put the food in a different section, and you can mark the date that you put it then there. You’ll go in a clockwise direction around the bin. The worms will follow the food source. By the time you get back to that first spot, you should no longer recognize the food that you put in there. If you can still see recognizable food, then you shouldn’t put anymore in until it’s gone. I put eight ounces of worms in this moist bedding, and here I have four ounces of food scraps. I’m going to start in the section number one, just pull the bedding aside and bury the food shallowly.
That’s the extent of how you feed them. You put the lid back on, and put the bin in its nesting tray. Be careful that you don’t overload your bin with food. If you do, it can become smelly and you can develop a fruit fly problem. You want to go at the pace that the worms can consume. Take it slowly. It’s normal to see molds and very tiny creatures inside your worm bin. They’re all part of the worm bin web of life. Now here we’re fast forwarding to a bin that has been operating for several months. It looks quite different in here, much darker material. The bin will gradually fill with worm droppings or worm castings as they consume the food and the bedding that you put in here. This is a nutrient-rich material that you can put on your garden.
Once every few months, you’re going to need to harvest the castings from the bin, and then put the worms back in with fresh bedding to keep them going. Get yourself a sheet of plastic, and then scoop out the composted material. You can create a little windrow or some small cone-shaped piles. The worms that are in this material will quickly burrow down to the bottom of the pile.
They don’t like being exposed to light or dry air. One way to make them move a little more quickly is to set up a light and shine it right on the pile. You have to wait a few minutes, just continuously brush the composted material aside. The worms will continue to burrow down to the bottom of the pile to the point where eventually all you’ll have left is a pile of worms, and a separated pile of composted material.
The end product, or worm castings can go into your garden or be mixed with potting soil for houseplants.
If you are worried about flies, make sure that you bury your food scraps as outlined in the grid system above.
Use 3 Types of Worms and One Type of Fly Larvae to Compost your Food Scraps and Garbage
Learn how to make your first composting bin for $5.
Compost indoors or outdoors year round.
…and more.
My name is Ken, I own Wormman.com, and I grow and sell bugs. I started my business in 1995 after growing a large amount of red worms to fill my garden with worm castings. I love to garden and I bought some worms out of the back of a classified ad in a magazine. I grew those worms by feeding them our food scraps and the manure from our bunnies. I was soon inundated with worms, so I created more worm bins and expanded my garden. At one point, I had so many worm bins and beds that it was almost uncontrollable. I showed my wife, who does not share my passion for gardening or insects, and she said “you bought worms from a magazine. There has to be more people like you out there. Sell the excess worms.” Genius! Why didn’t I think of that?
The Internet was brand new back then, so I dialed into America Online and found that I could get 5 free websites just for being an AOL member. Those weren’t responsive websites like we have today. In fact, it was a 3 page site. The main page listed what I wanted it to say and the other two pages were for contact info and biographical information. No shopping cart, no Facebook links, no social media at all because it did not exist yet.
The last 22 years have been a roller coaster. I built the business to a million dollars in sales per year, and then crashed it, fought through a cricket virus, a mealworm shortage, 9/11, and my own stupidity. (Scroll down for more...)
Check Our Our First Site and What AOL Looked and Sounded Like in Memory Lane:
I have written a book called Profitable Worm Manual. The information above and much more is in that book We will have it available for download soon. In the meantime, I wanted to offer you something free that I wish that I had when I started.
Basic Worm Composting Free Ebook:
Learn the basics of vermicomposting with this ebook. I cover the basics on raising Red Worms, European Nightcrawlers and African Nightcrawlers. I also cover composting with Black Soldier Fly Larvae. This ebook is yours free. Please download it here. I will also update you when my much bigger AND FREE 🙂 Profitable Worm Manual is released. I will also send you periodic worm farming news if you want it.
Thank you!!
Ken
Learn The Secrets of Composting With 3 Types of Worms
Get Your Free Ebook and learn how to compost with Red Worms, European Nightcrawlers, African Nightcrawlers and one special chapter on composting with Black Soldier Fly Larvae.
Last week we had our first freeze here in New Jersey. We often get a first freeze that then melts and does not freeze again for a week or so. Then we get a hard freeze later in November or early December. That first freeze is our gue to tuck our red worm and European nightcrawlers in for winter. The one question that I often get is around feeding composting worms during the winter, especially if the worm bed is outside in the elements.
The questions range from the kind of food we recommend for Redworms and European night crawlers, to how to feed the food we recommend. The questions also delve into how we protect outdoor worm beds in winter, what we cover them with and when we cover them.
Winter feeding is an entirely different way of feeding composting worms than summer feeding. There are three things that we look to accomplish with winter worm bed feeding:
We look to ensure that we have enough feed on the beds so that we do not have to disturb the worms during the dead of winter. The tops of the worm beds will often freeze and the red worms and European nightcrawlers will retreat and form a protective ball by huddling beneath the frozen worm bedding. That freeze creates a frozen cap that will actually protect the worms under the freeze line. By breaking that cap, turning beds or digging into beds, you can expose your composting worms to the cold air and that will kill them. We aim to feed them before the first deep freeze and then leave them until spring.
We want to have a food that is safe, deep enough and still green enough to generate some heat, which will create a safe space for the worms to feed and even breed on the warmer days throughout the winter.
We want to have the food last to the point where, as soon as the temps rise above freezing but before the beds are warm enough to work, the worms begin breeding and depositing capsules in and under that winter food that we provide. This will ensure a nice healthy swarm of babies happily eating the leftover food when we open up the beds after that danger of the last freeze has passed, which is late April or even May in New Jersey.
We our three worm feeding goals laid out, we begin that task of preparing and adding the food to our beds.
Worm Food Preparation: During the three other seasons, we ensure that any manure fed to the worms is mixed to a specific ratio in order to ensure that it is past the heating stage before it is fed to the worms. The last thing that we want is for the bedding to heat on a hot or warm day. In Winter, our goals change. We do mix the manure with shredded paper and straw before use, and we do allow it to heat for a couple of days but then we apply it before it has completely heated to the point where it is beyond that heating stage. We do this so that the heat created by the breakdown of the bedding will provide some heat to the worm beds. We are not looking for super-warm temperatures, but enough so that the worms can still move about and eat throughout the winter. In order to do that we mix in more green material than we normally would and we add alfalfa pellets like the type sold as rabbit food.
So, we add fresh manure, straw and paper, wet it down, pile it high and let is begin to break down. Then we mix in dry alfalfa pellets and lightly water. We want it to be on the drier side because the food mix will break down more slowly that way as it appropriates water from the worm bed.
Worm Food Application:
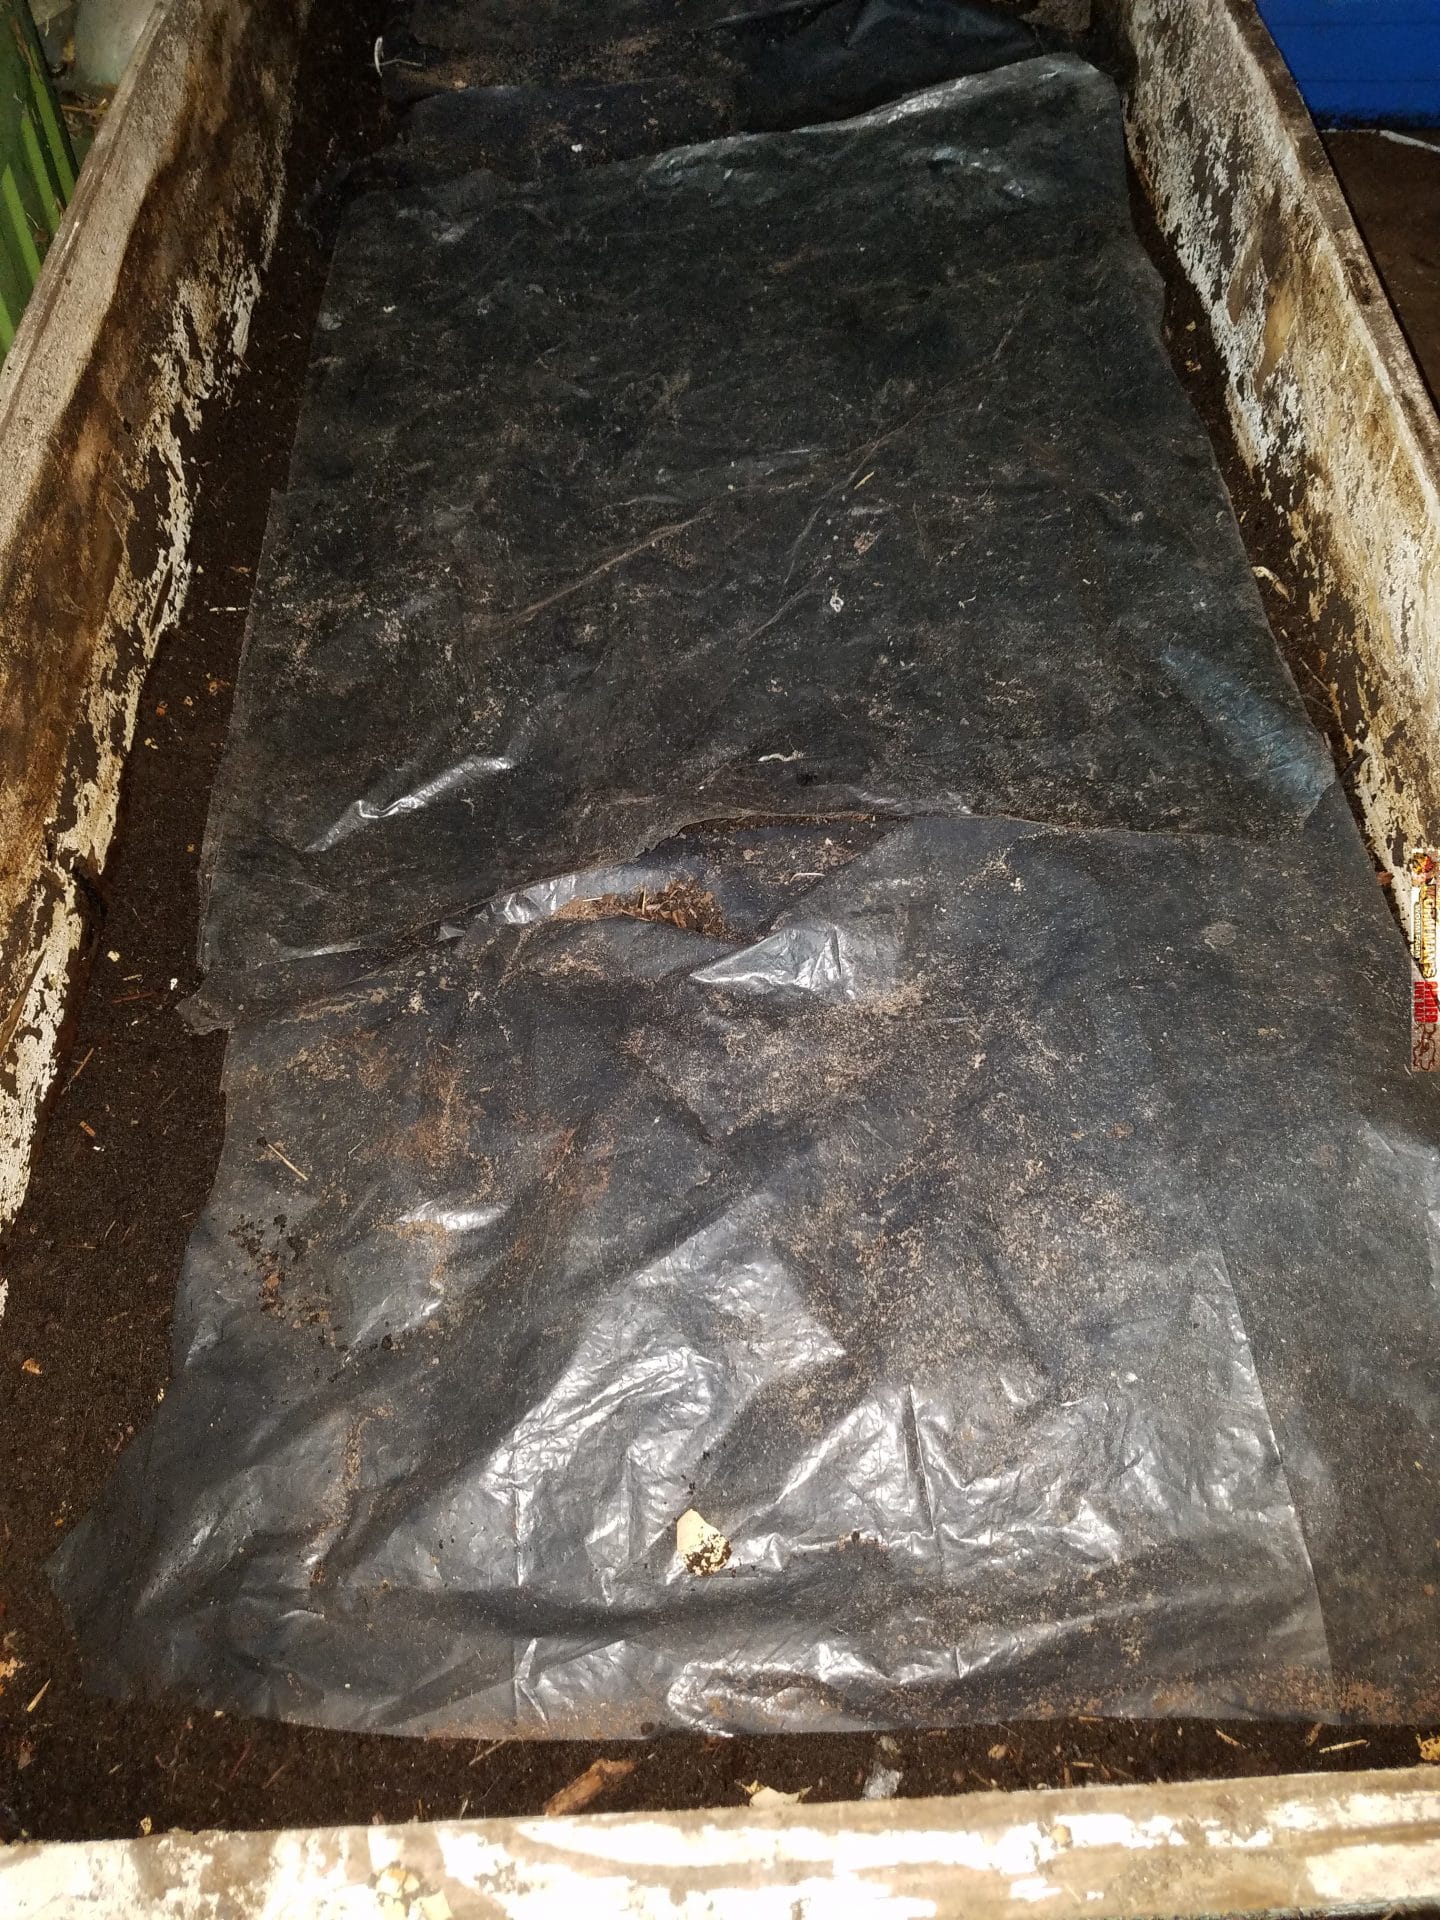
After the food has been prepared and is ready to go, we apply it to the worm bed. We pile it high and deep and shape it like a triangle.
We cover that triangle food pile with a polyethylene bubble plastic like the kind used in packaging to prevent shipping damage but ours is thicker plastic. We also sometimes use polyethylene bubble insulation that is metallic looking. See the pictures below. That blanket acts as a blanket and keeps the heat in and the cold out.
We then cover the entire bed with thick industrial grade landscaping fabric, like the kind used on the ground at nurseries to keep the weeds out and to stage their potted plants on.
We weigh that fabric down with bricks or sandbags and then we do not disturb the worms again until Spring. When we do life the fabric and the blanket in spring, we find hundreds of thousands of baby worms in what used to be a large pile of food, eating what is left of it. The adults deposit their capsules at the food source where the babies will be likely to find ample food.
That is it. This is how we feed our worm beds in Winter and how we prepare our beds for the long cold disgusting winters. It is 11-16-2017, so get to work.
Now, the good news is that we also have indoor beds and we sell European Night Crawlers and Red Worms all year long. Winter composting and worm rearing is a great way to learn about worm farming and take away the winter doldrums. Check out our selection of composting worms and get gardening now. Spring will be here soon than you think.
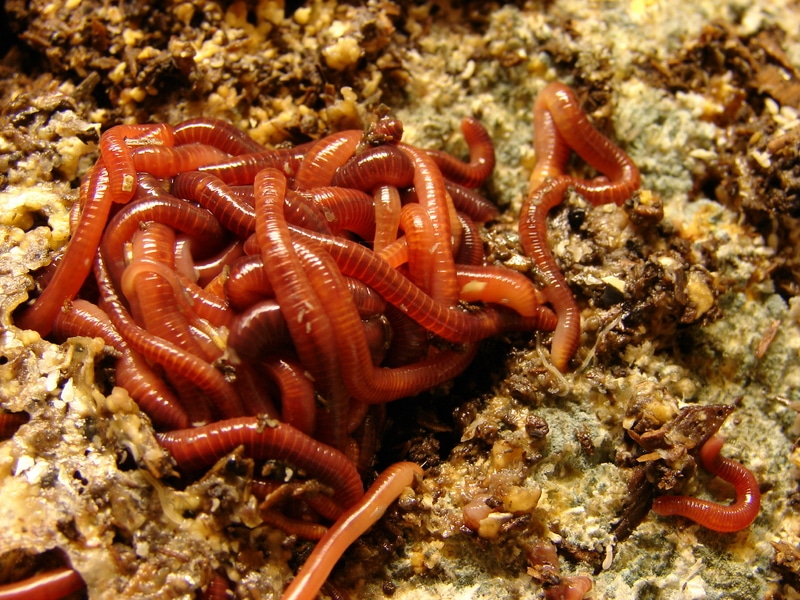
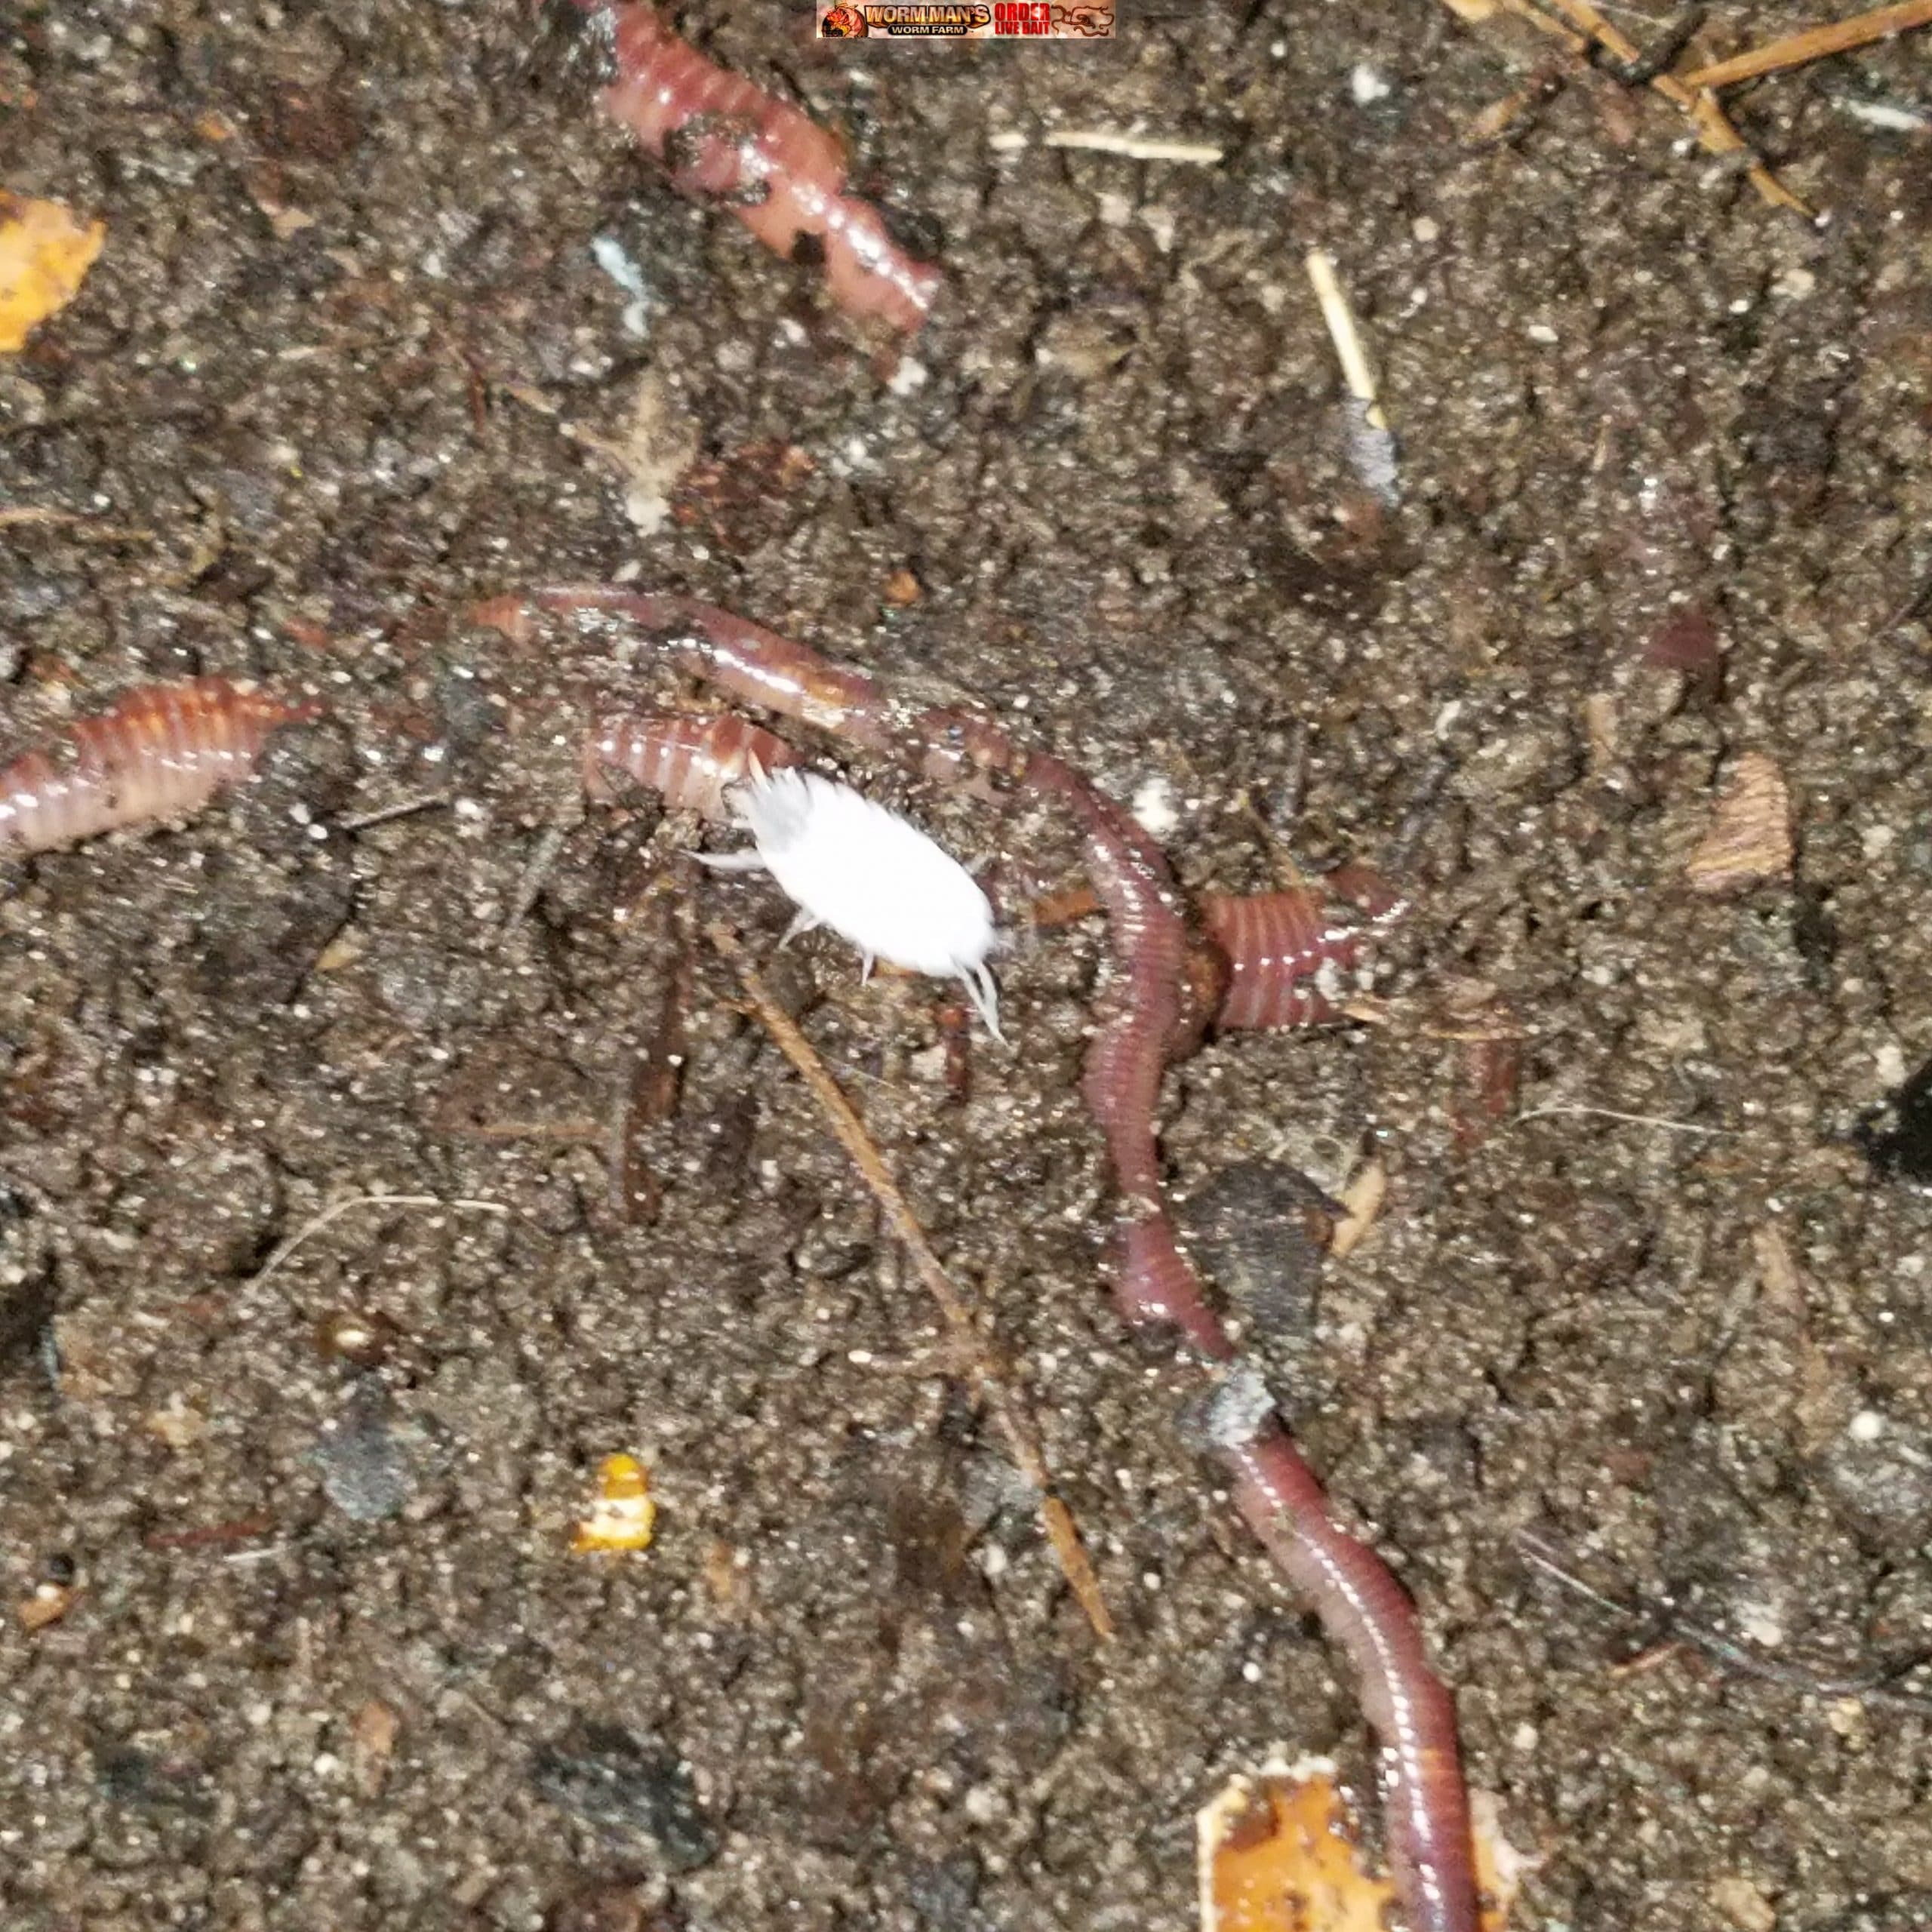
Two Redworms caught breeding in the bed on the Memorial Day! Party animals…or invertebrates! Why do I feel like the guy from TMZ who does the breaking celebrity news?
Anyway, I thought that it was cool. I was feeding a breeding bed when I caught these two going at it so I turned on my camera phone and they got shy, broke apart and slithered into the night.
Share your pictures of your breeding worms caught in the act here with us.
Sometimes we don’t realize that there is a problem in our relationship with our significant other until they just leave one day. One day, you wake up, find a text from another person, a pair of foreign underwear under the car seat, lipstick on their collar or they just up and leave you and you are left befuddled and heartbroken, trying to figure out what happened and how you could have stopped it.
Well, I had that moment this morning and I can tell you that same goes for worm farmers and their worms. Today, at 4 AM, I was awakened by the soft sound of light rain. Farmers get up early. I made a cup of coffee and decided to take a walk out to look at the 500,000 red worms we harvested yesterday, which were to be shipped today. Nothing seemed out of place as I walked to our staging area, which is outside but is under canopies. Then I noticed the lights were off. We always keep low wattage lights over our new beds or newly harvested worms. It stops even the worst offenders from crawling off from their new digs.
The lights were a clue but didn’t really register right away. I was too busy thinking about how the got shut off. Everyone knows better. Maybe I didn’t turn them on? Maybe I shut them off by accident? I am getting up there. I will be 50 in 6 months. I may have had a pre-senior moment.
I flipped the lights on and saw the swarm. Worms moving in masses in every direction. I should have run back to grab my phone to tape the swarm but I was too busy, living in the moment, grabbing handfuls of worms and tossing them back into harvesting bins. I scrambled on hands and knees scooping and pawing at the ground, trying to save the worms and my livelihood from slithering away.
I grabbed what I could, ran inside to get my son to help me and when I returned, the swarm was gone. The light had forced them to march on. The light caused them to scurry to darker pastures.
I estimate that we lost about 200,000 worms this morning out of the 500,000 that we harvested last night. That hurts. We will be fine, we will harvest more and we will be shipping on time this morning, but it really struck me about how much the relationship between a worm farmer and his worms is so much like any other relationships in this world. If you don’t treat your worms right, they will leave you.
So, what made them crawl off? Worms will leave you for 5 good reasons;
1. The are too crowded. Crowded worms will crawl off to be less crowded. They will also stop breeding or will breed less in crowded conditions.
2. The don’t like the food. If you are not feeding you redworms enough, or if you are feeding them things that they do not like, they will leave you.
3. Improper pH. Worms need a good pH of around 7 to thrive. If you do not test their bedding and adjust the pH, you will lose your worms. They will either “fly” or they will die. Get a good pH meter and test your worm bedding weekly.
4. They will flee if their bedding becomes anaerobic. You can tell an anaerobic worm bed by the smell. It smells like rotting death and will usually have very wet bedding. Worms cannot tolerate anaerobic conditions. Keep the bed turned weekly to aerate, keep the bedding moist but not wet and make a habit of smelling the bedding.
5. Worms will crawl off if it is raining and they are outside. I don’t care how well you care for your worms, if it is raining, your worms will sometimes crawl off just for the sake of crawling off. You can stop this by installing anti-crawl barriers, lids or lights over the beds during periods of prolonged rain. Please don’t electrocute yourself.
Well, I made a short video of the aftermath of the crawl. I am going to have a good cry now and then I will put on my big boy pants and get back to work because we have orders to fill today.
Please check out https://www.Invertebrateauction.com if you are looking to buy and sell your own invertebrates. Dismiss
Home
We are glad you are here. It gets lonely just talking to worms, crickets and fruit flies all day. Please engage with me, ask me a question or post a comment. Check out our forum and our directory. If you need worms, roaches or any type of feeder insects, please try Wormman.com


You must be logged in to post a comment.