

Today I am going to write about worm composting.
Keeping a compost pile going year round in New Jersey is a challenge, especially this year because we had almost two solid weeks at zero degrees. If you’d rather not go out into the cold and snow to dumb your kitchen scraps on your rock solid, frozen, compost pile, consider setting up a worm composting system indoors. You can keep this going year round. Worms will process your kitchen, paper and cardboard scraps.
Start your vermicomposting project on a small scale, and expand as you learn. You can graduate to bigger and bigger worm bins, and more worms until you eventually graduate onto a multiple bin system, or even on to a large worm bed.
To get started, you’ll need a worm bin, some bedding, some water, the right kind of worms and some food.
Try a 10-gallon plastic tub for starters. You can get one from Walmart for $5. Here is a video that I made about that.
Drill 8 to 12 quarter-inch holes in the base of the tub for drainage, and then drill some half-inch holes along the upper edge on both sides for air circulation. Nest your tub into a plastic tray on top of blocks, or upside down plant pots in my case. Don’t worry that the worms are going to try to escape through the holes, they would rather stay in the bin unless there’s something very wrong inside the bin. Your bins should be no more than 18 inches deep so that the material in the bin doesn’t become too compacted. The worms need to be able to move freely through the bin, and they need plenty of air.
Bedding is the stuff in which the worms crawl around, and where you bury your food. It needs to be light and moist and fluffy. My favorite bedding is shredded newspaper with some shredded leaves or coconut coir added in.
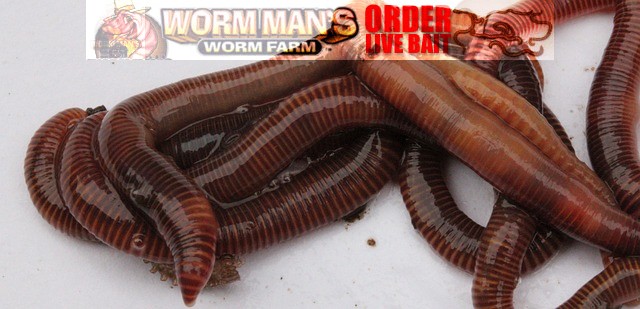
The type of worms that you need for worm compost, or vermiculture are called Red Wiggler, or Eisenia fetida. They’re much smaller than earthworms, and they reproduce really well in captivity. They process a lot of organic matter, and they don’t mind being disturbed. Regular earthworms that you find in your garden will not work for composting. Those worms burrow very deeply in the cool soil, and they do not survive when kept in a container. You can order Red Wigglers from a garden supply catalog a bait shop, or here at Wormman.com
How many worms do you need, and what can you feed them? Get yourself a small kitchen scale, and weigh the food scraps that you generate every day for one week. That means fruit and vegetable scraps, coffee grounds, tea bags, and grains. No meat, bones, fatty products, or dairy. Worms can process about half their weight in food per day. If you generate an average of four ounces of food scraps per day, then you would need eight ounces of worms in your bin in order to process the food that you’re going to be adding on a daily basis.
Head on over to How Many Worms do I need and they will calculate it for you.
If you start with a smaller amount of worms, just feed them less. Their population will grow, and you’ll be able to feed them more over time. When you get your worms, you want to sprinkle them on top of the bedding. Remember, the bedding needs moist but not wet, and should be fluffy.
Then put the lid on the bin. They will quickly burrow down into the bedding. On your lid, take a piece of paper and draw a grid with eight equal sections. Every time you feed your worms, you’ll put the food in a different section, and you can mark the date that you put it then there. You’ll go in a clockwise direction around the bin. The worms will follow the food source. By the time you get back to that first spot, you should no longer recognize the food that you put in there. If you can still see recognizable food, then you shouldn’t put anymore in until it’s gone. I put eight ounces of worms in this moist bedding, and here I have four ounces of food scraps. I’m going to start in the section number one, just pull the bedding aside and bury the food shallowly.
That’s the extent of how you feed them. You put the lid back on, and put the bin in its nesting tray. Be careful that you don’t overload your bin with food. If you do, it can become smelly and you can develop a fruit fly problem. You want to go at the pace that the worms can consume. Take it slowly. It’s normal to see molds and very tiny creatures inside your worm bin. They’re all part of the worm bin web of life. Now here we’re fast forwarding to a bin that has been operating for several months. It looks quite different in here, much darker material. The bin will gradually fill with worm droppings or worm castings as they consume the food and the bedding that you put in here. This is a nutrient-rich material that you can put on your garden.
Once every few months, you’re going to need to harvest the castings from the bin, and then put the worms back in with fresh bedding to keep them going. Get yourself a sheet of plastic, and then scoop out the composted material. You can create a little windrow or some small cone-shaped piles. The worms that are in this material will quickly burrow down to the bottom of the pile.
They don’t like being exposed to light or dry air. One way to make them move a little more quickly is to set up a light and shine it right on the pile. You have to wait a few minutes, just continuously brush the composted material aside. The worms will continue to burrow down to the bottom of the pile to the point where eventually all you’ll have left is a pile of worms, and a separated pile of composted material.
The end product, or worm castings can go into your garden or be mixed with potting soil for houseplants.
If you are worried about flies, make sure that you bury your food scraps as outlined in the grid system above.
